Adding Columns to Tableau Data Sources
Table Linking in Tableau Data Sources
The example below adds a new column from the Invoice Details table to the _Sales_Invoice Tableau data source. The instructions assumes you have basic knowledge of your source system's database structure, ETL+ and Tableau.
Open DataSelf ETL+ and log in.
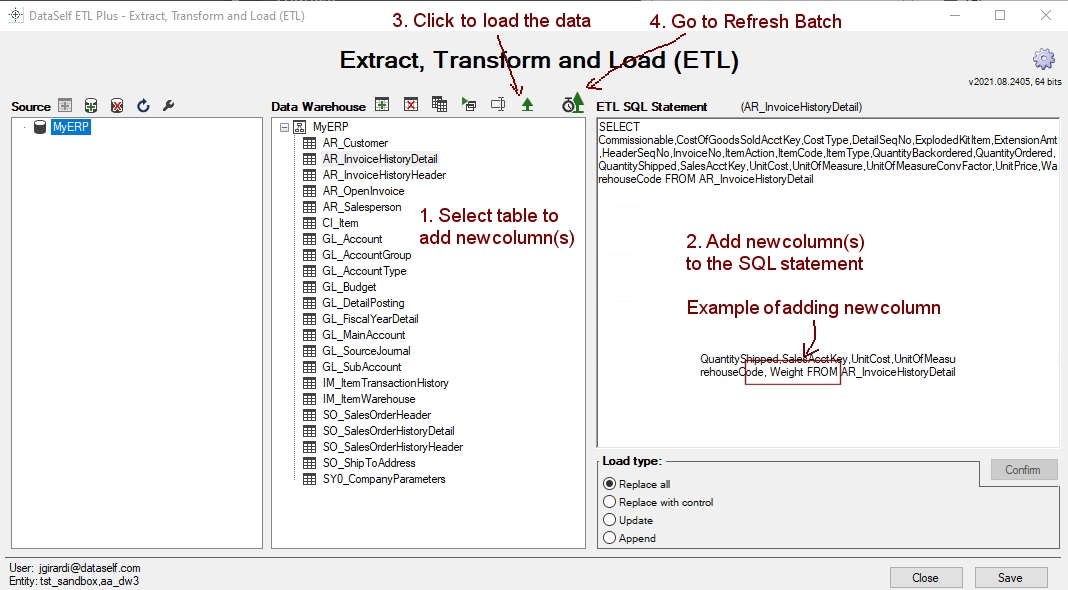
1. Select the InvoiceDetail table on the Data Warehouse panel (this table feeds the _Sales_Invoice Tableau data source).
2. To add new columns edit the SQL in the ETL SQL Statement. In most cases, just add “,SourceTableColumnName" in the SELECT statement. See image.
Repeat steps 1 and 2 for all tables that need new columns.
If you wait for the next scheduled data refresh, you can skip steps 3 to 6 below.
3. Load the data to the cloud from each modified table by selecting the table on the Data Warehouse panel and clicking the Load icon.
4. Go to the Refresh Batch page by clicking Refresh Batch icon.

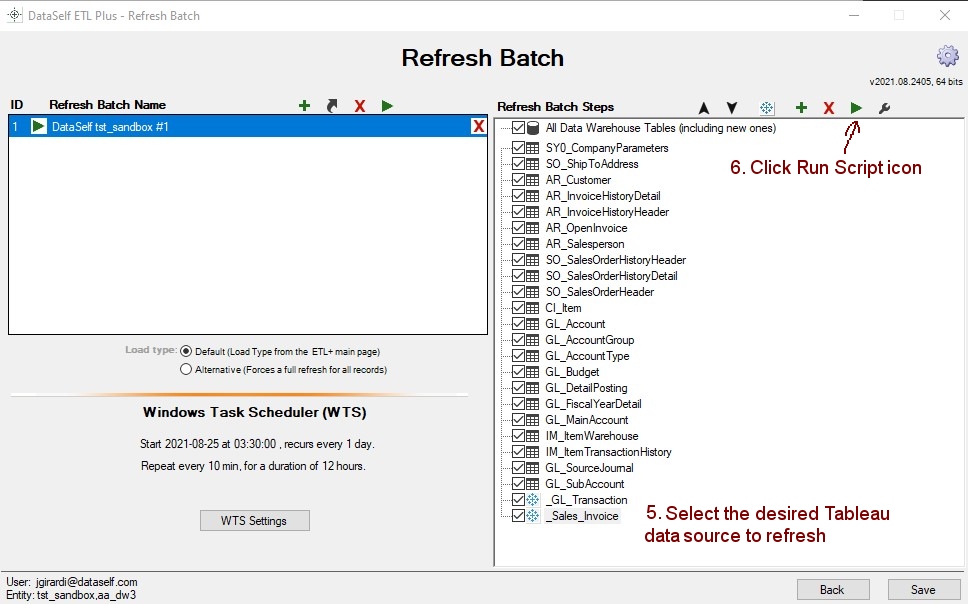
5. On the Refresh Batch Steps panel, select the Tableau Data Source to be refreshed.
Example: _Sales_Invoice
6. Click Run Script icon and wait for the data source refresh to complete.
Repeat steps 5 and 6 for other Tableau data sources to refresh.

7. Open your DataSelf Analytics portal (Tableau OEM Web Server, https://dataselfbi.com). Edit a report from the modified Tableau data source.
Example: Select a _Sales_Invoice report or dashboard.
For more about Tableau Web Editing training: DataSelf Training
8. Click Edit.

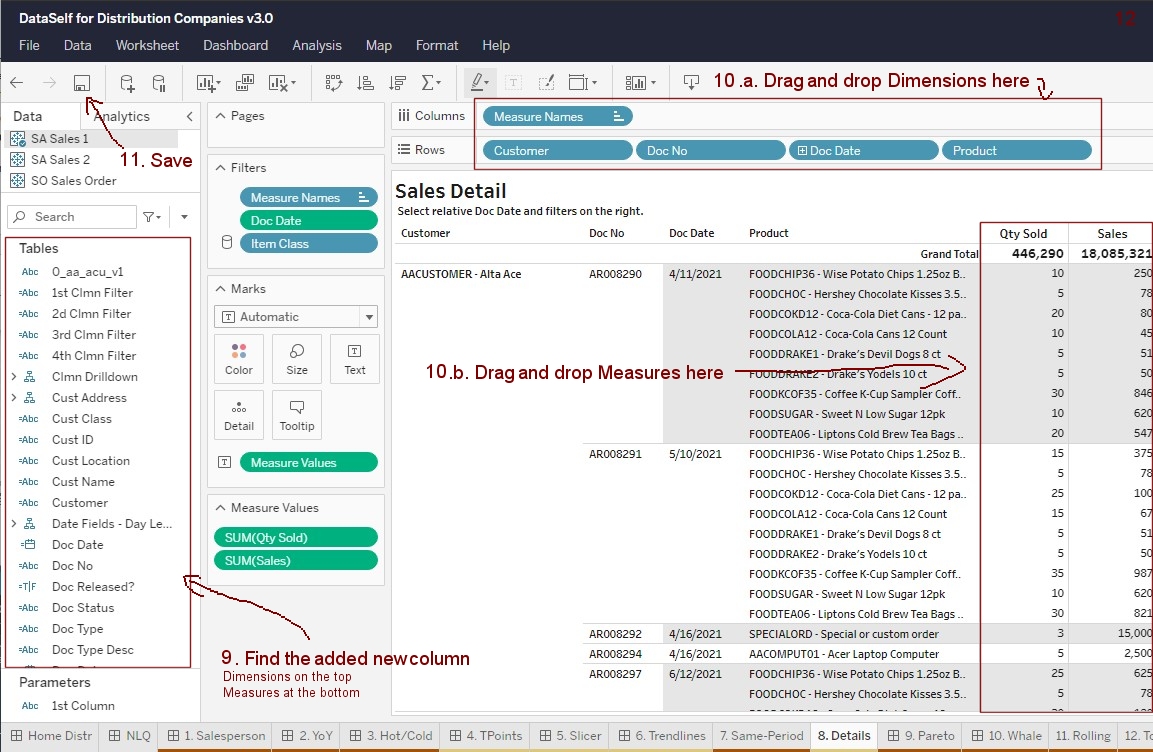
9. Find the new columns just added on the left panel.
Dimensions are listed at the top of the Tables section, measures at the bottom.
10.a. Drag and drop new Dimensions to Columns and/or Rows on the top.
10.b. Drag and drop Measures into the measure report area or the Measures Values shelf.
11. Click Save to save your customized report.
12. Click X on the top right to close the report.

Table Linking in the Data Warehouse
Contact DataSelf support.
