
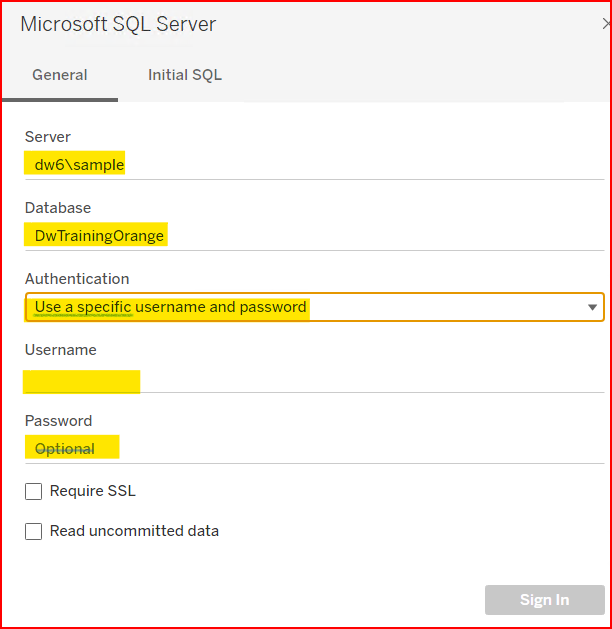
To create a brand-new Data Source, you start out by connecting to the SQL Server data warehouse.
Required information is the full SQL Server name, the Database name, and your SQL user login info. The password is required, not optional.
The Data Source window displays with no tables. Note the SQL server connection info in upper left, database name in mid left, then table names.
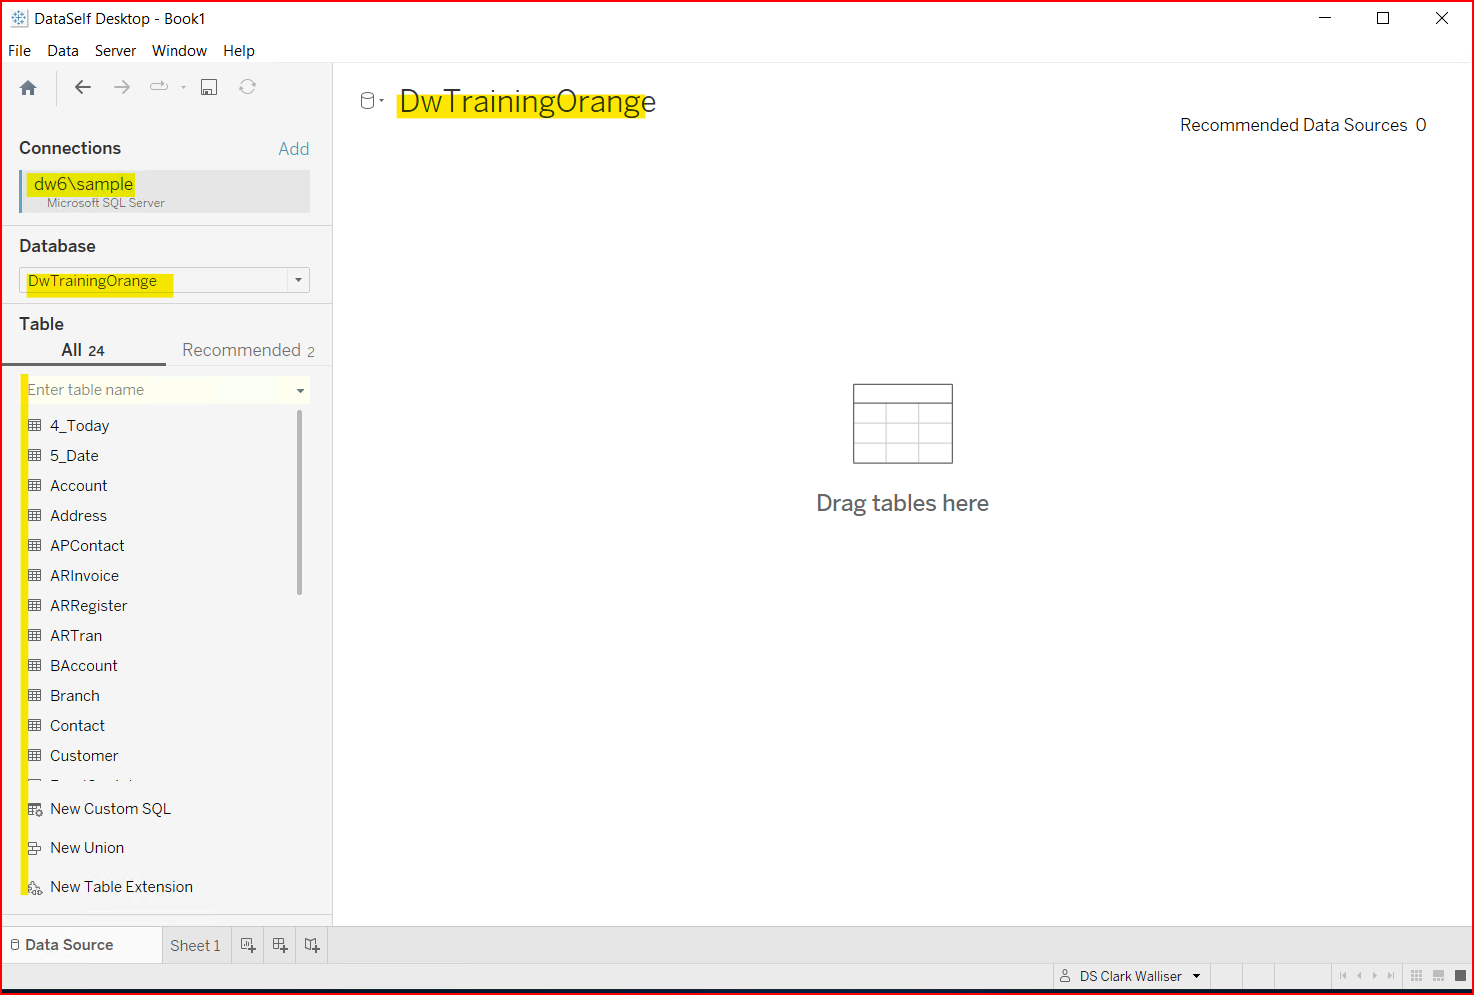
Note: creating a multi-table data source from blank requires a working knowledge of database design.
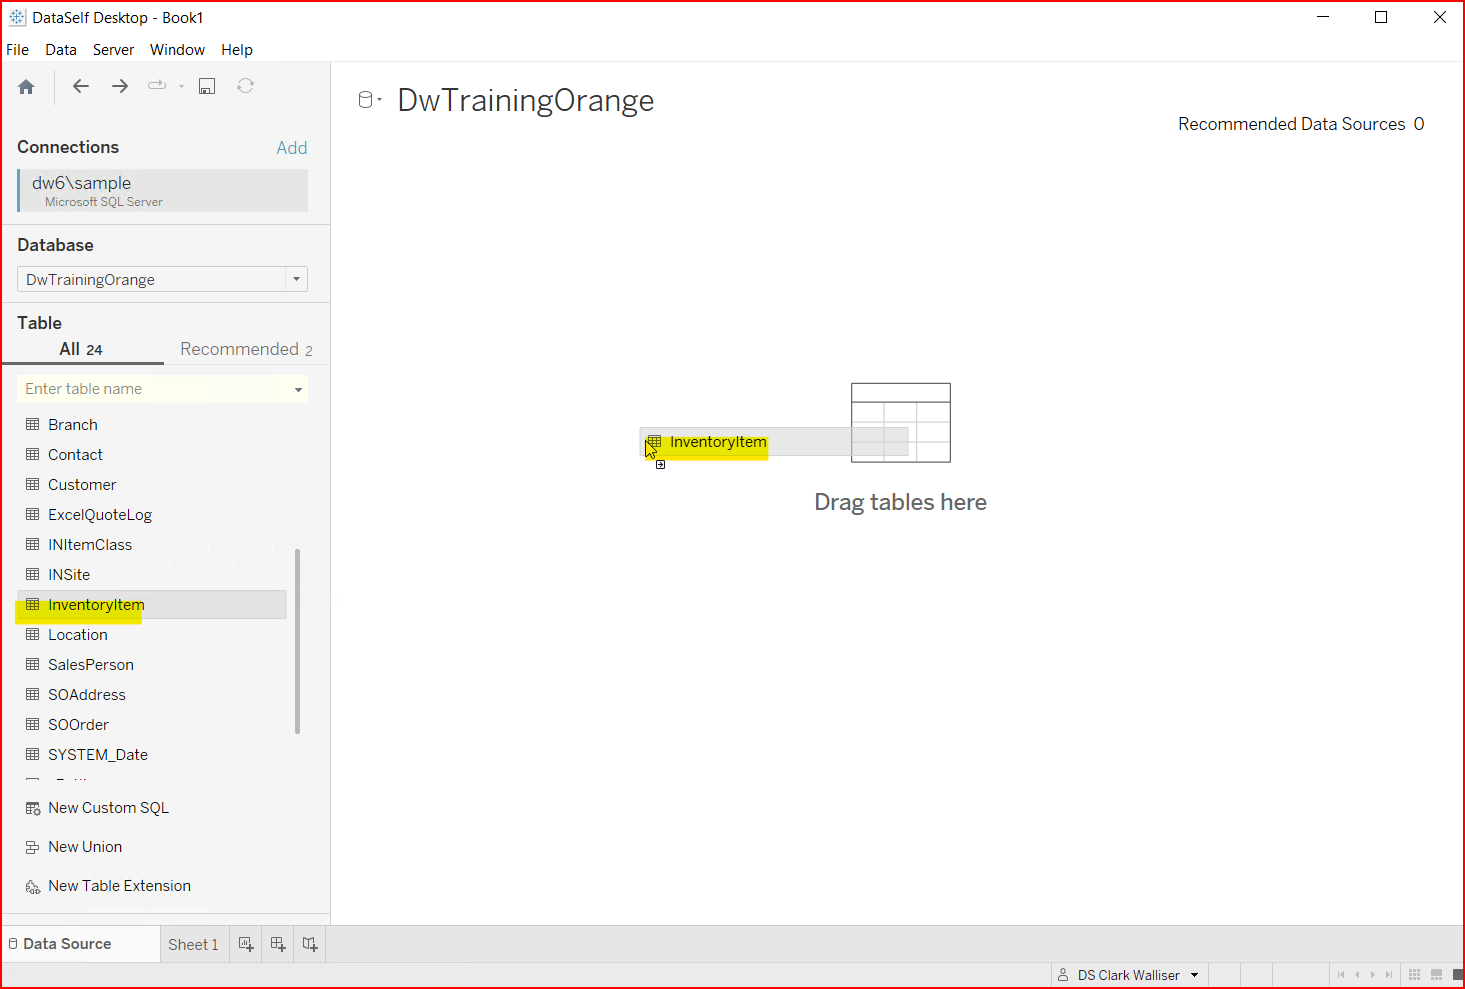
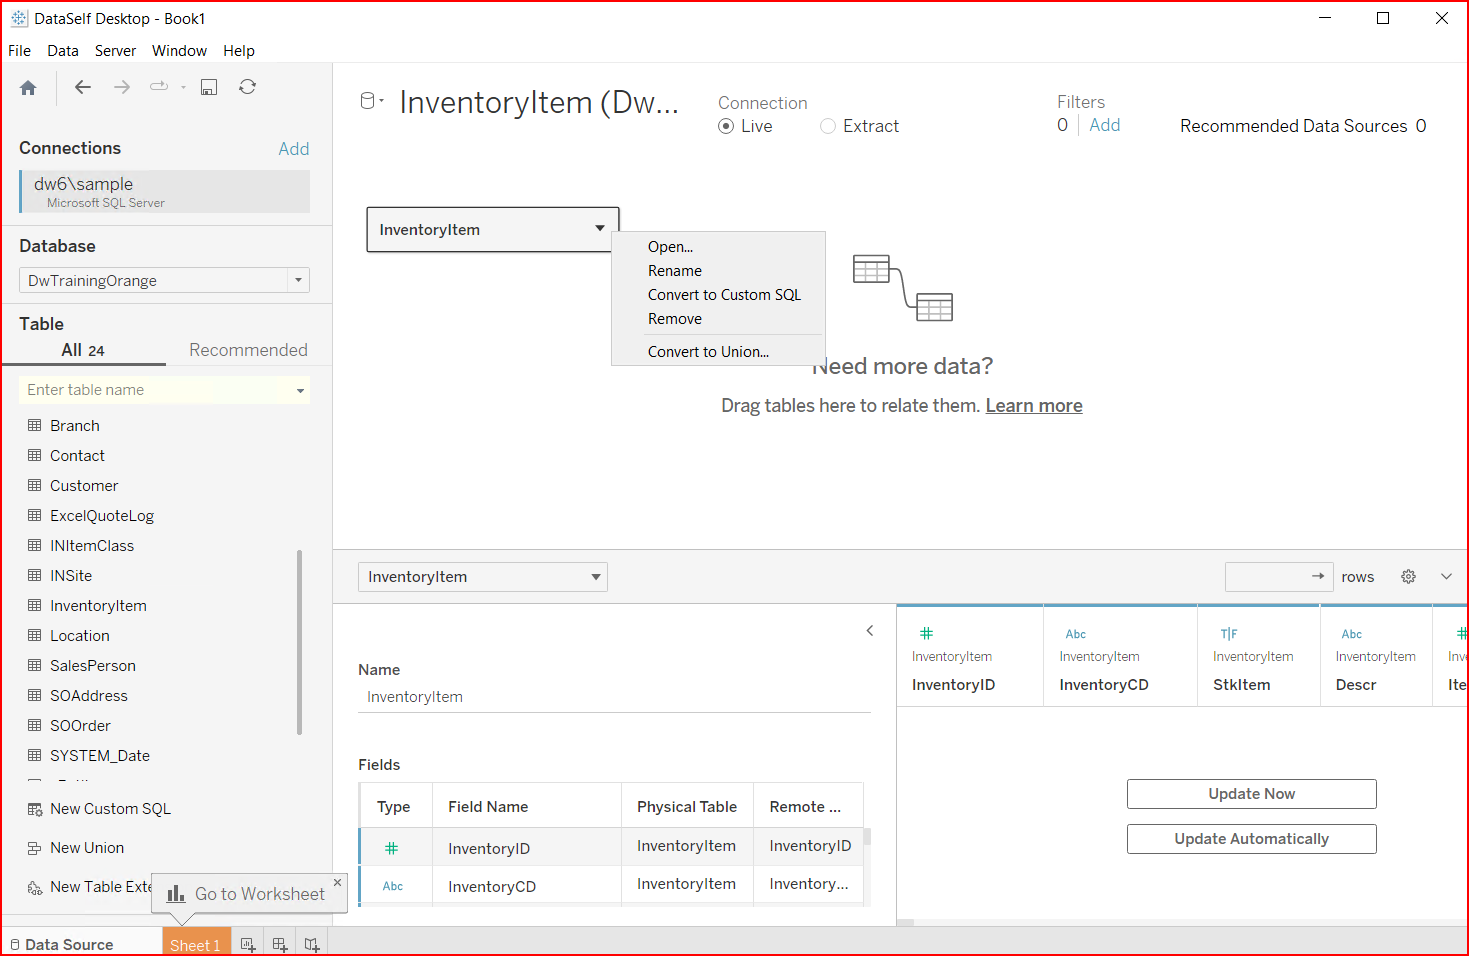
Determine which SQL table is your primary table and drag it onto the tables area. Tableau converts the single SQL table to a Tableau data object. Some people prefer to work with the Tableau objects. DataSelf’s current policy is to open the Tableau object and add SQL tables directly.
In the screenshot below, the INItemClass table was added. Tableau found the first matching field names in both tables and created an Inner (Equal) Join between the Tables. It is your responsibility to validate if this is the correct join logic. You can do this by going to Sheet 1 and testing the data display.
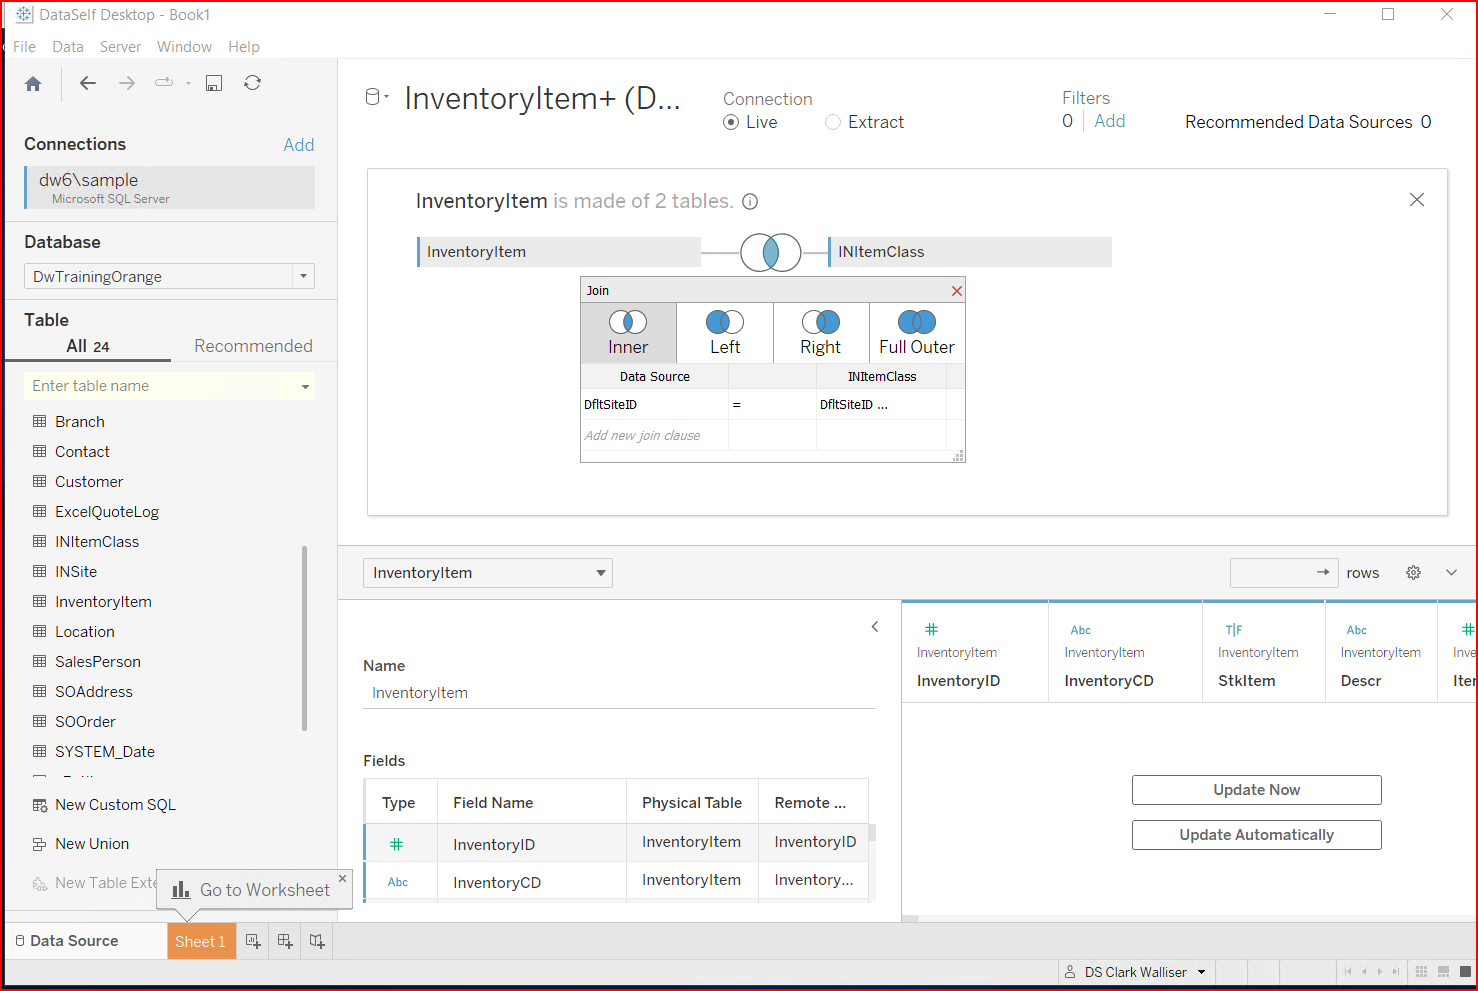
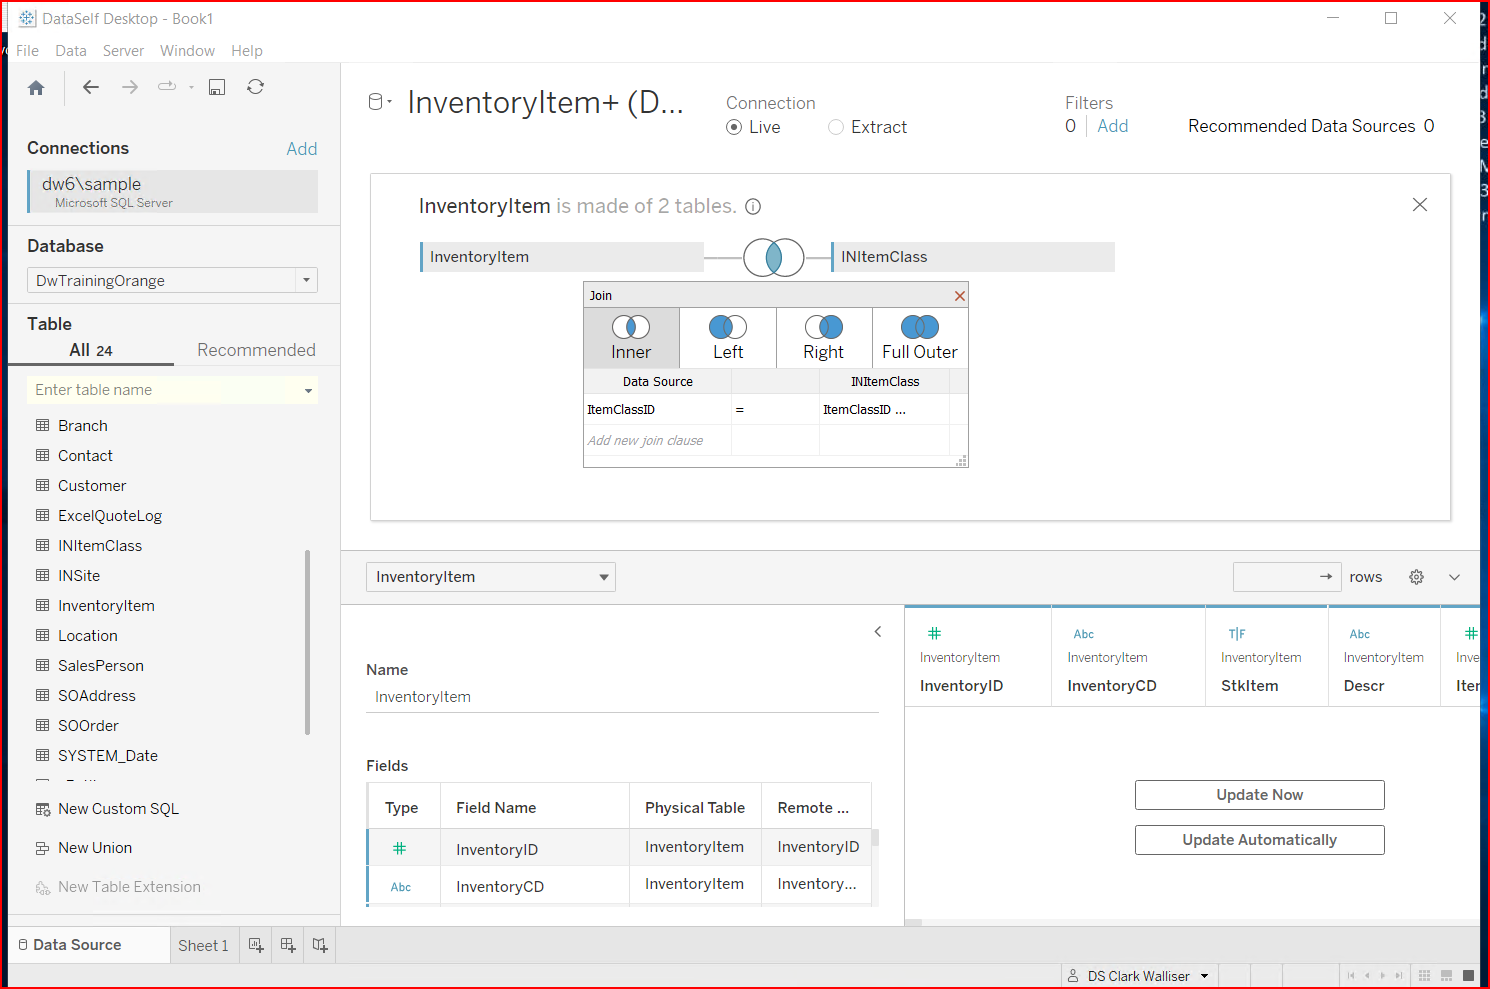
On testing it revealed that the join is not correct. Going back to the Data Source tab and checking the Join options, it is determined that the correct Join is on the ItemClassID field in both tables.
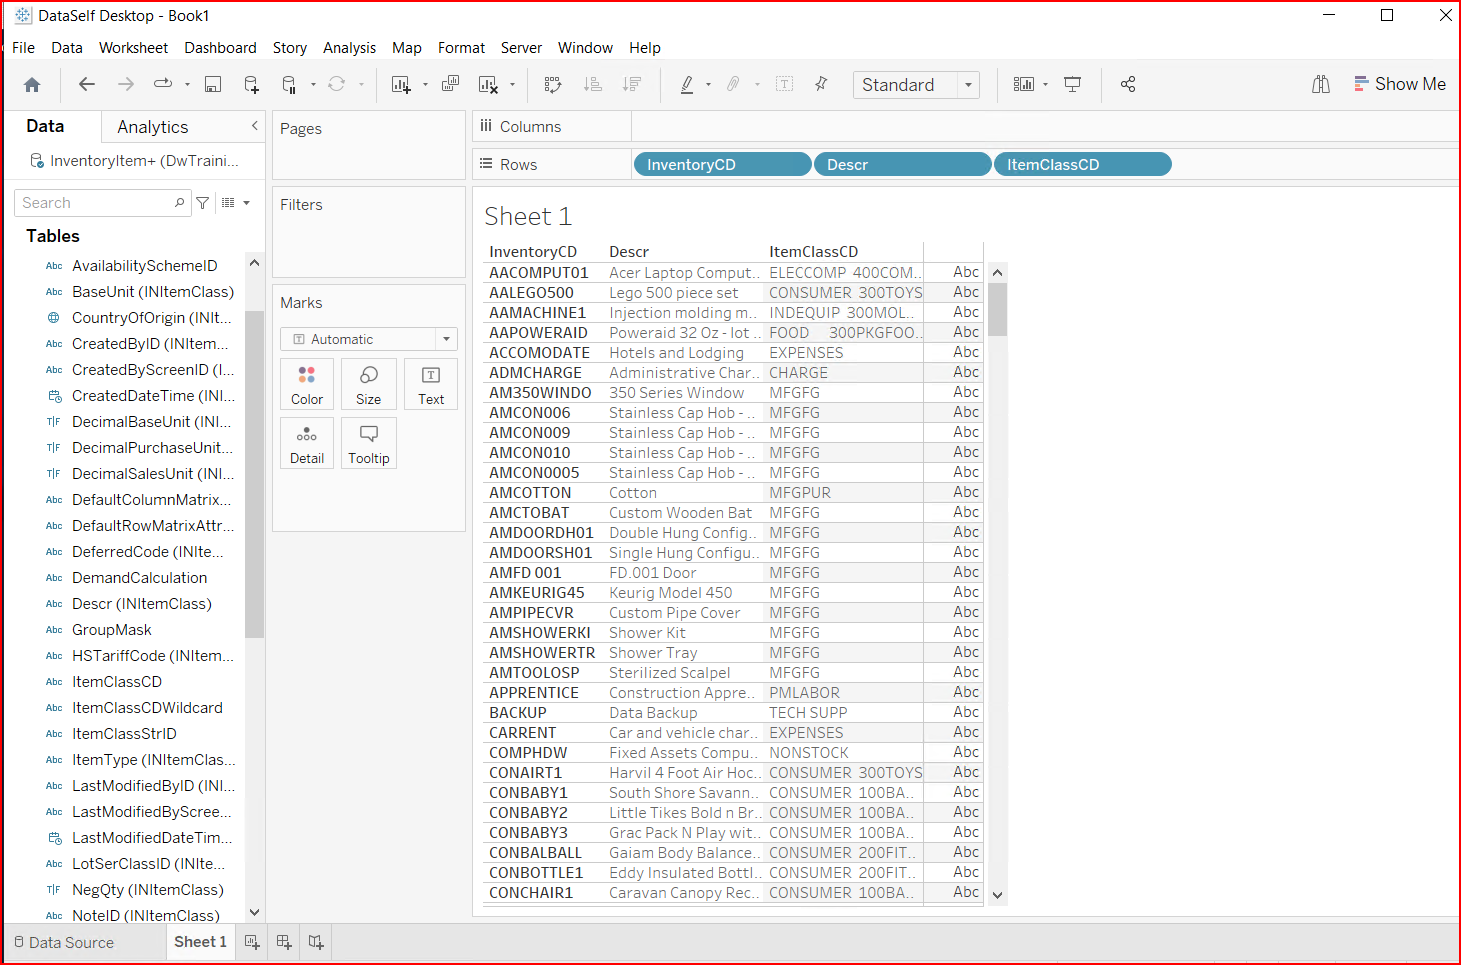
The view on Sheet 1 now shows data as expected.
The next step is to modify the field properties about which fields to hide, and what calculated fields you want. This was already covered in the section on modifying a data source.
The final steps are to extract the data and publish the data source. This also was covered in the section on modifying a data source.