
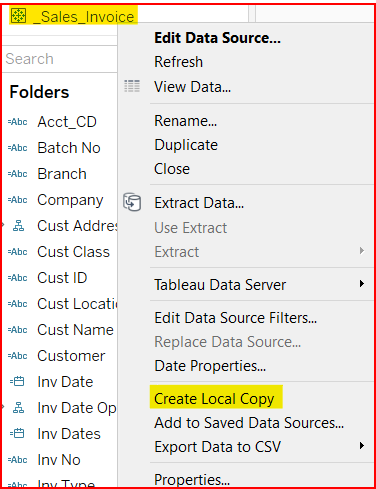
Modify an existing Tableau Data source (TDS)
Right click on the Sales_Invoice Data Source and select Create a Local Copy.
The location window will display with the default path to the Documents\My Tableau Repository\Datasources folder. This is not a required location, simply the default. Once you have published the modified Datasource back to the Tableau site, you can delete the local copy.
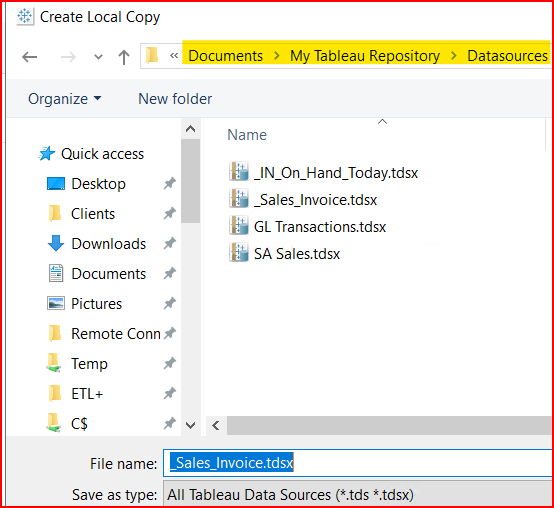
Tableau will run the data query that created the original extract and store it on your computer.
If the Data Source has millions of records, this might take a while, depending on internet speed, etc.
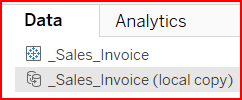
After it has downloaded, you will see two Data Sources in the Desktop app. You can close the online Data Source since you won’t do anything with it. You will overwrite it when you publish the modified version of it back to the Tableau site.
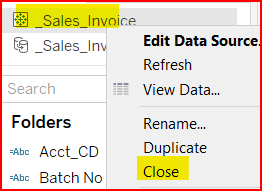
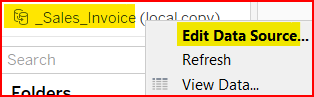
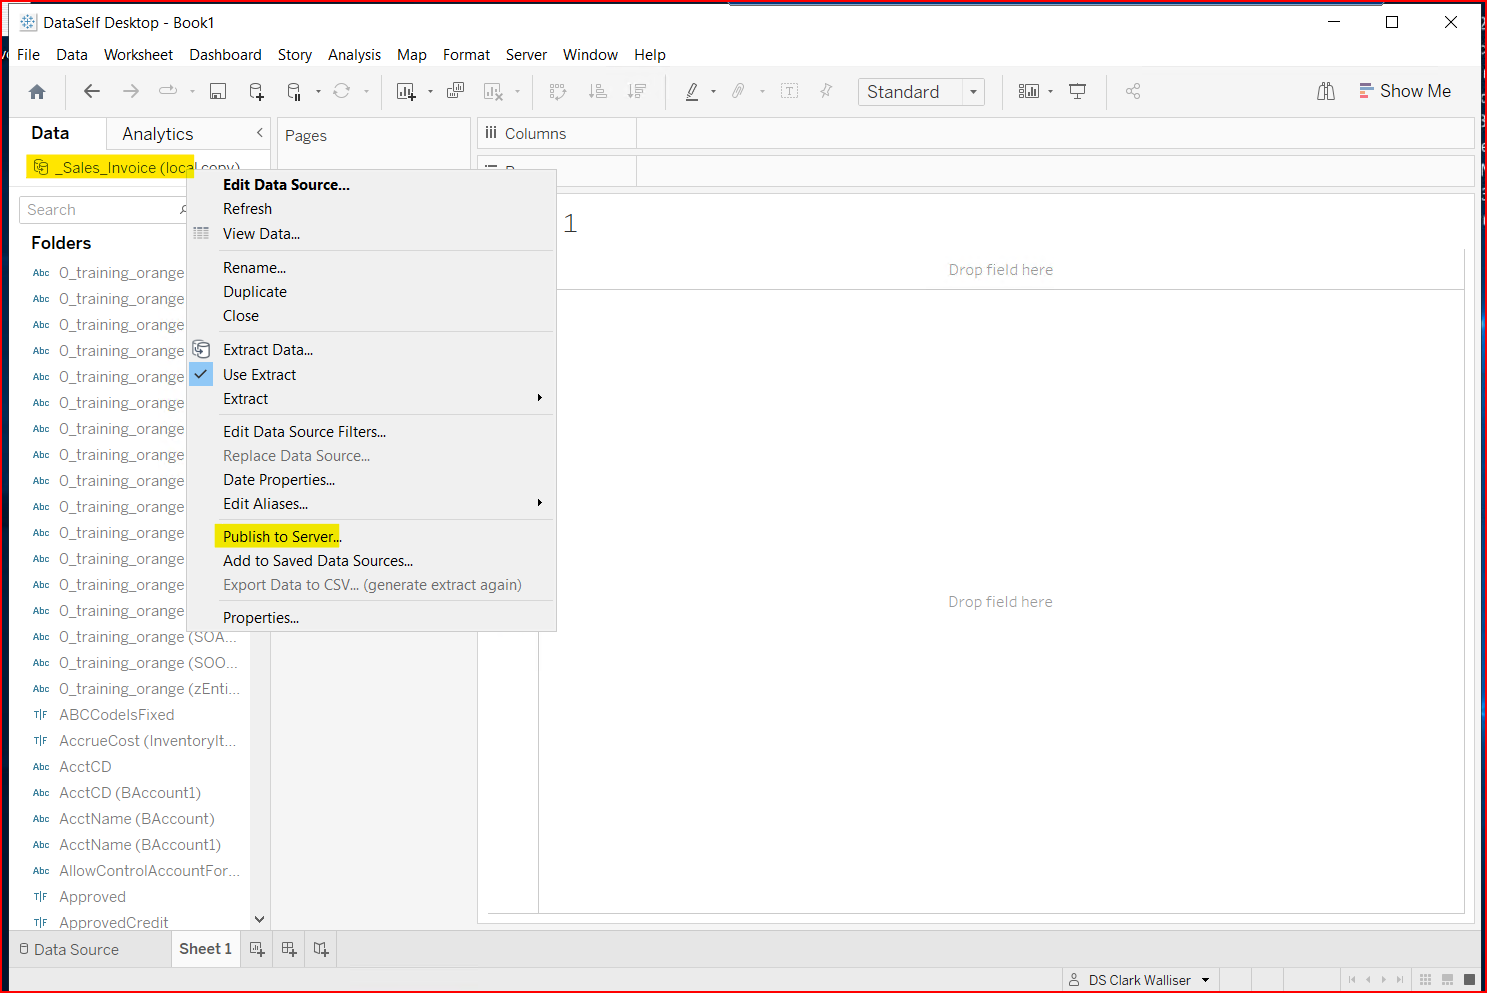
Right click on the local copy of the Data Source and select Edit Data Source
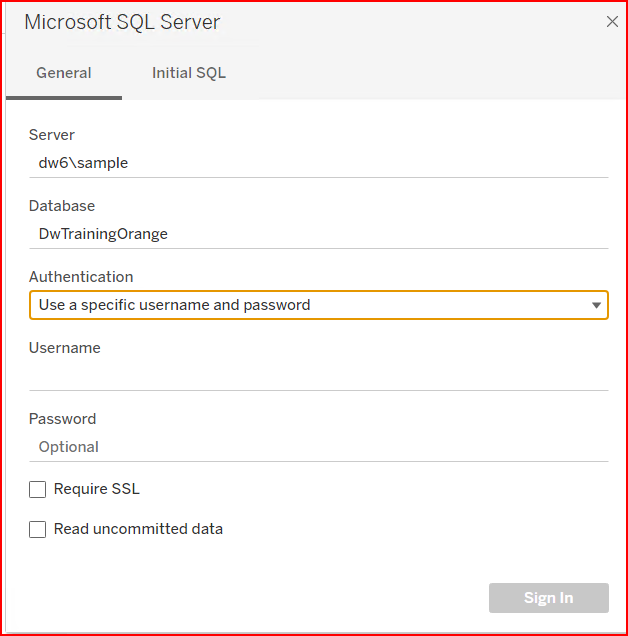
Connecting to the SQL source data
Since you are modifying the Extracted Data Source, you must connect it to the SQL Data Warehouse source it is pulling data from. This requires knowing the server and database names and have a valid specific SQL User login, (not the windows authentication login).
The Desktop app runs the query connecting the SQL Data Warehouse tables to the Tableau data set and displays the Data Source edit window.
Note: running this query process might take several minutes depending on the size & complexity of the query.
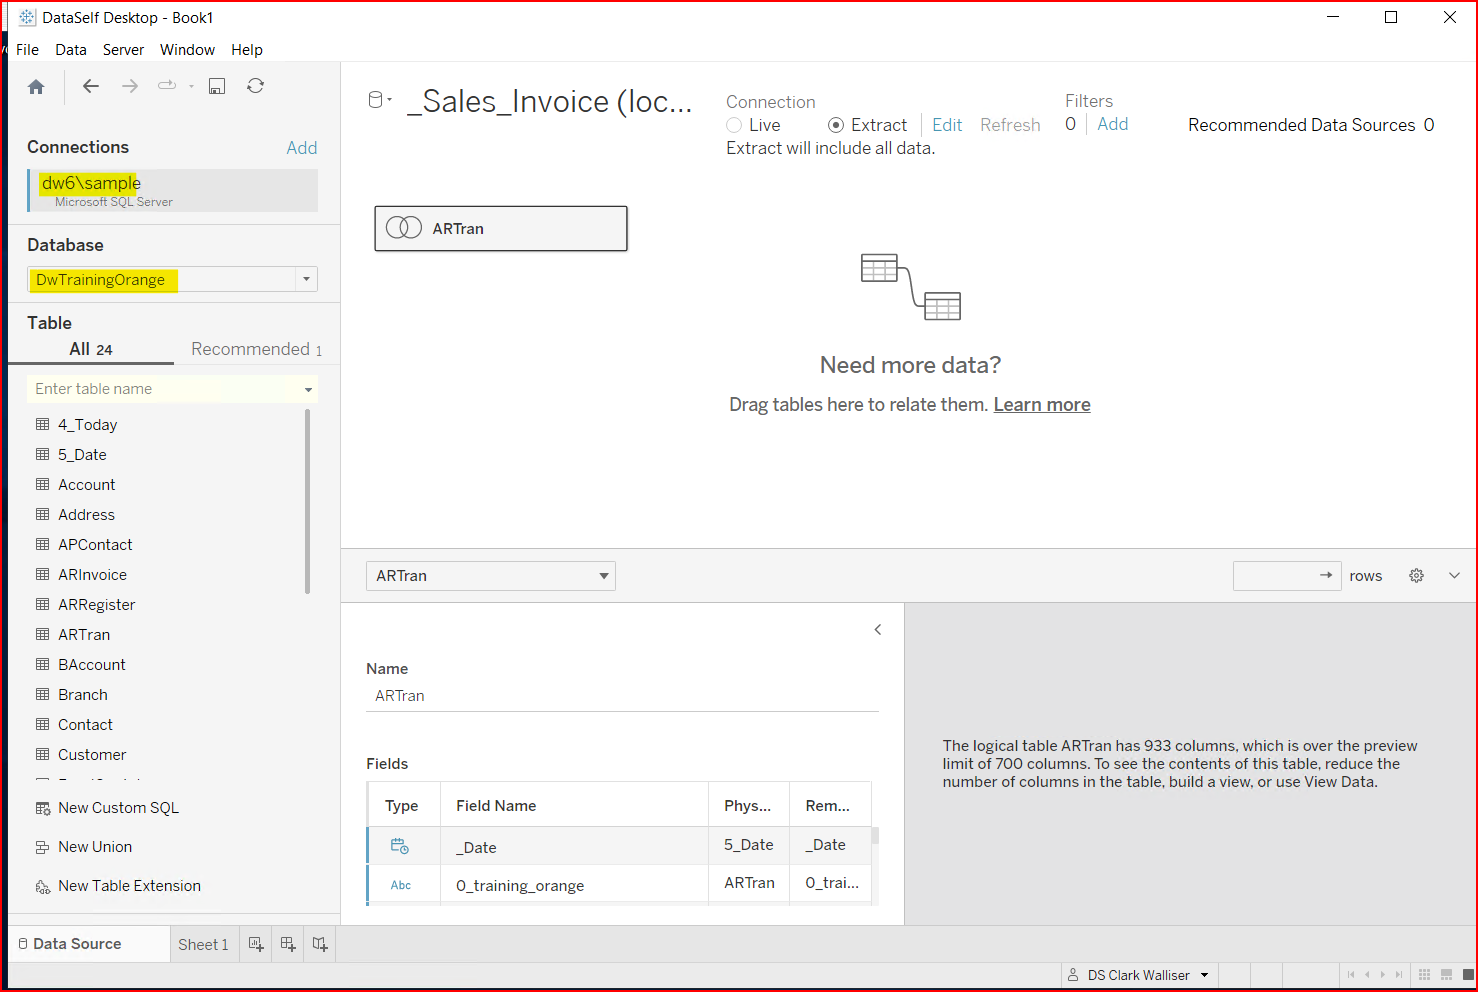
The Tableau Data Source Name shows at the very top. Within the data source is the Tableau field called ARTran. This is a Tableau object field that contains more information. The object name is simply the name of the first table within the object. To open the object, you can double click, right click and open, or click on the down arrow and open.
The top half of the screen shows the diagram layout of all the SQL tables and the join types.
-
The two circles with the left circle colored is a Left Outer Join.
-
The two circles with the center overlap colored is an Equal or Inner Join.
-
The two circles with the right circle colored is a Right Outer Join.
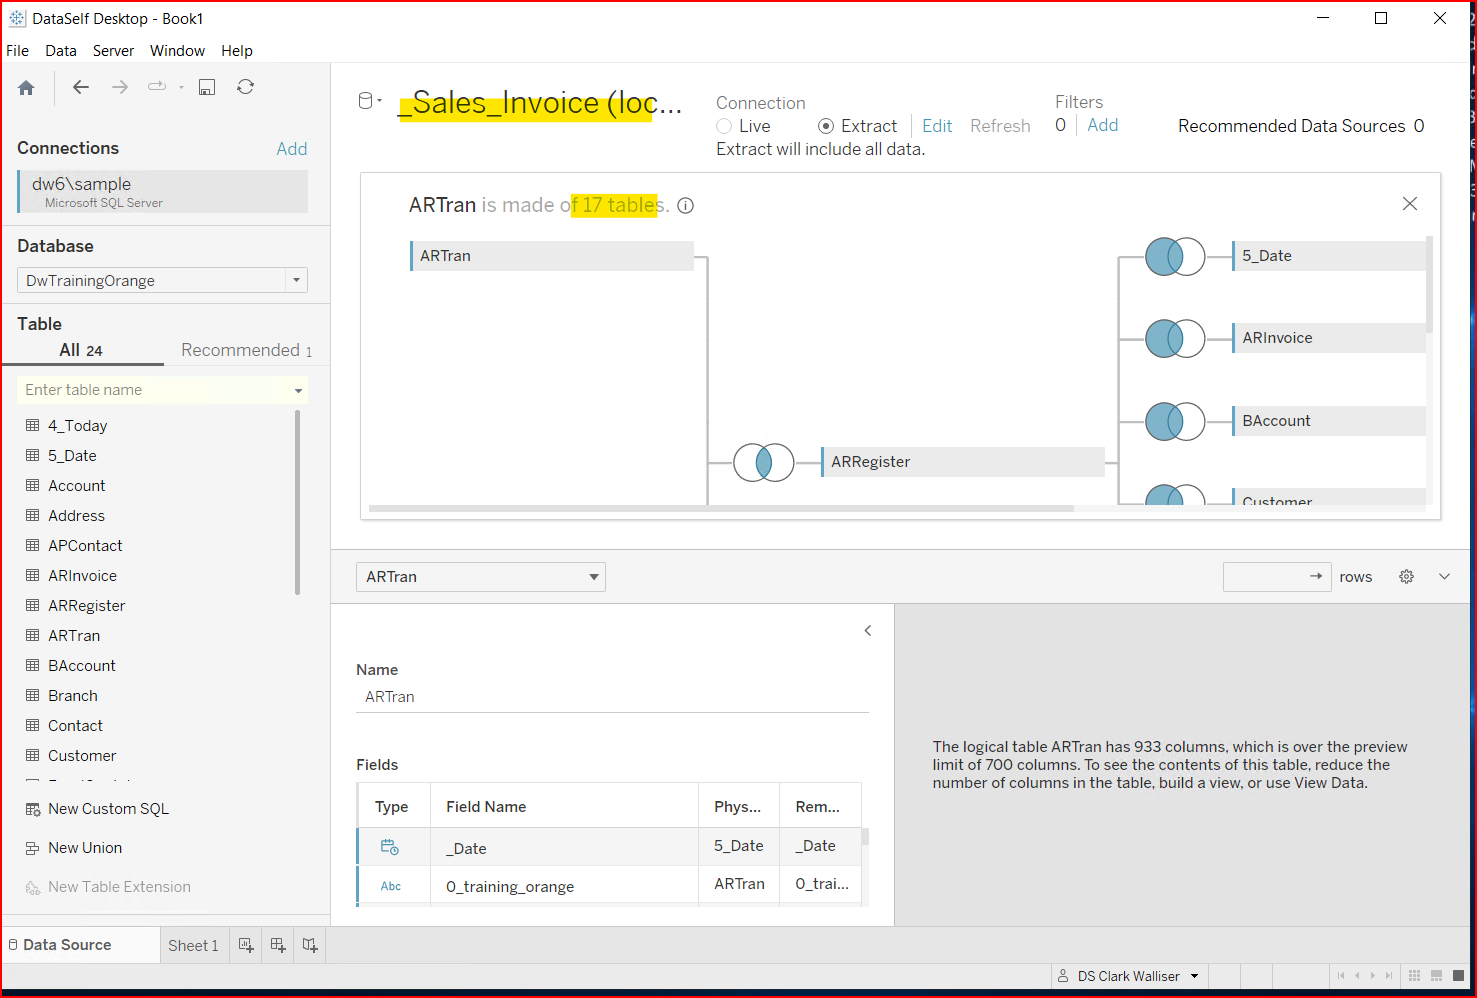
Click on the two circles icon to see the table join properties. In the screenshot below the unique link between records in the ARTran table and ARRegister table are ARTran.Refnbr = ARRegister.Refnbr and ARTran.TranType = ARRegister.DocType.

Note: This requires a working knowledge of database table linking rules for your data sources.
The bottom half of the screen shows the data field detail and properties. You can hide existing fields and create calculated fields. To see all the fields, click on the gear icon in upper right of section and select Show hidden fields. I find it easier to sort the fields in A to Z ascending order.
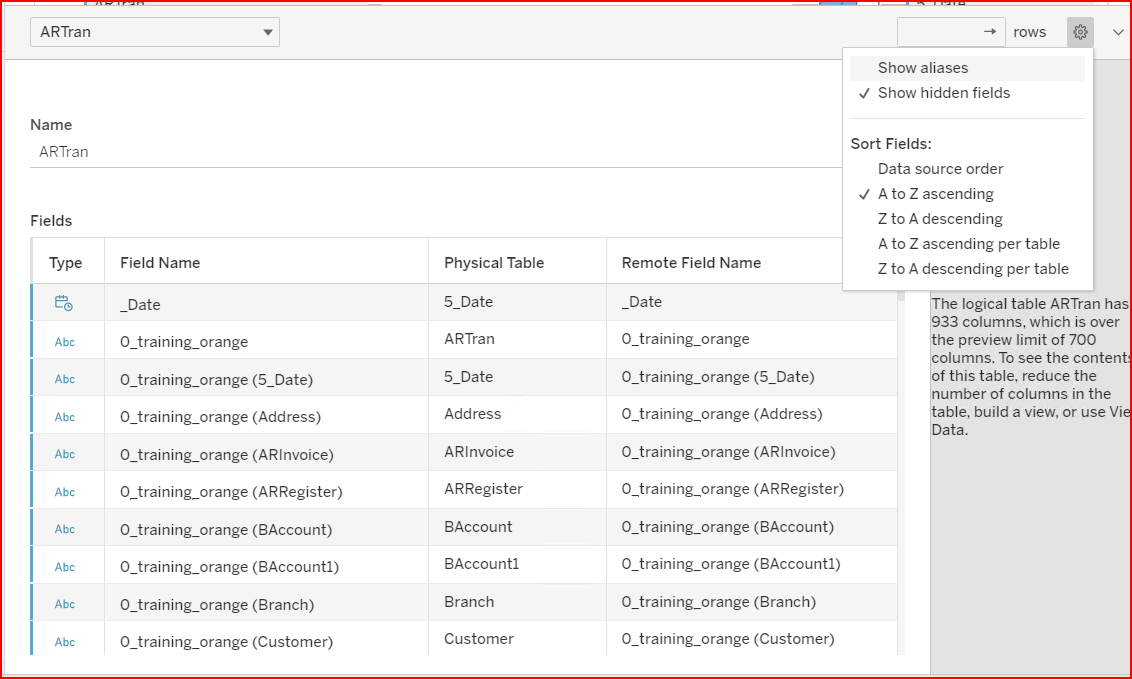
You can click on the top bar of the section and drag it up to make the section taller to display more data.
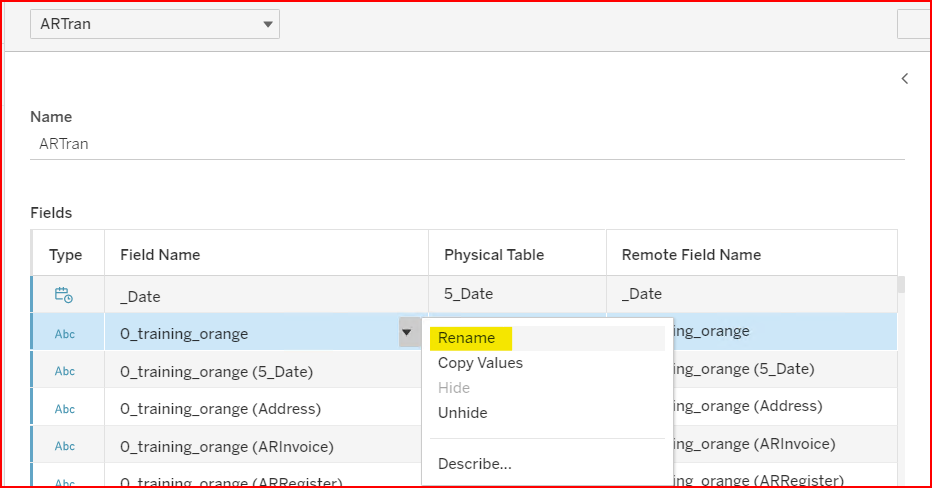
The Physical Table is the SQL table name. The Remote Field Name is the SQL field name. This is helpful when the Tableau field name is renamed. Clicking on the down arrow, or right clicking, displays the properties window. Notice the other property to hide/unhide the field.
Dataself’s policy is to never Rename the Tableau Field Name, or Copy Values.
Another DataSelf policy is to create Calculated Fields for the data fields you want to see, then hide the original fields. This way, if the ERP publisher changes field names, don’t have to go to EVERY workbook and manually change the field on the view. Just change field name referenced within the Calculated Field for the data set, then all the workbooks display as expected.
If you don’t see the field you recently added to the SQL data warehouse, try refreshing the data source.

Testing your data source modifications
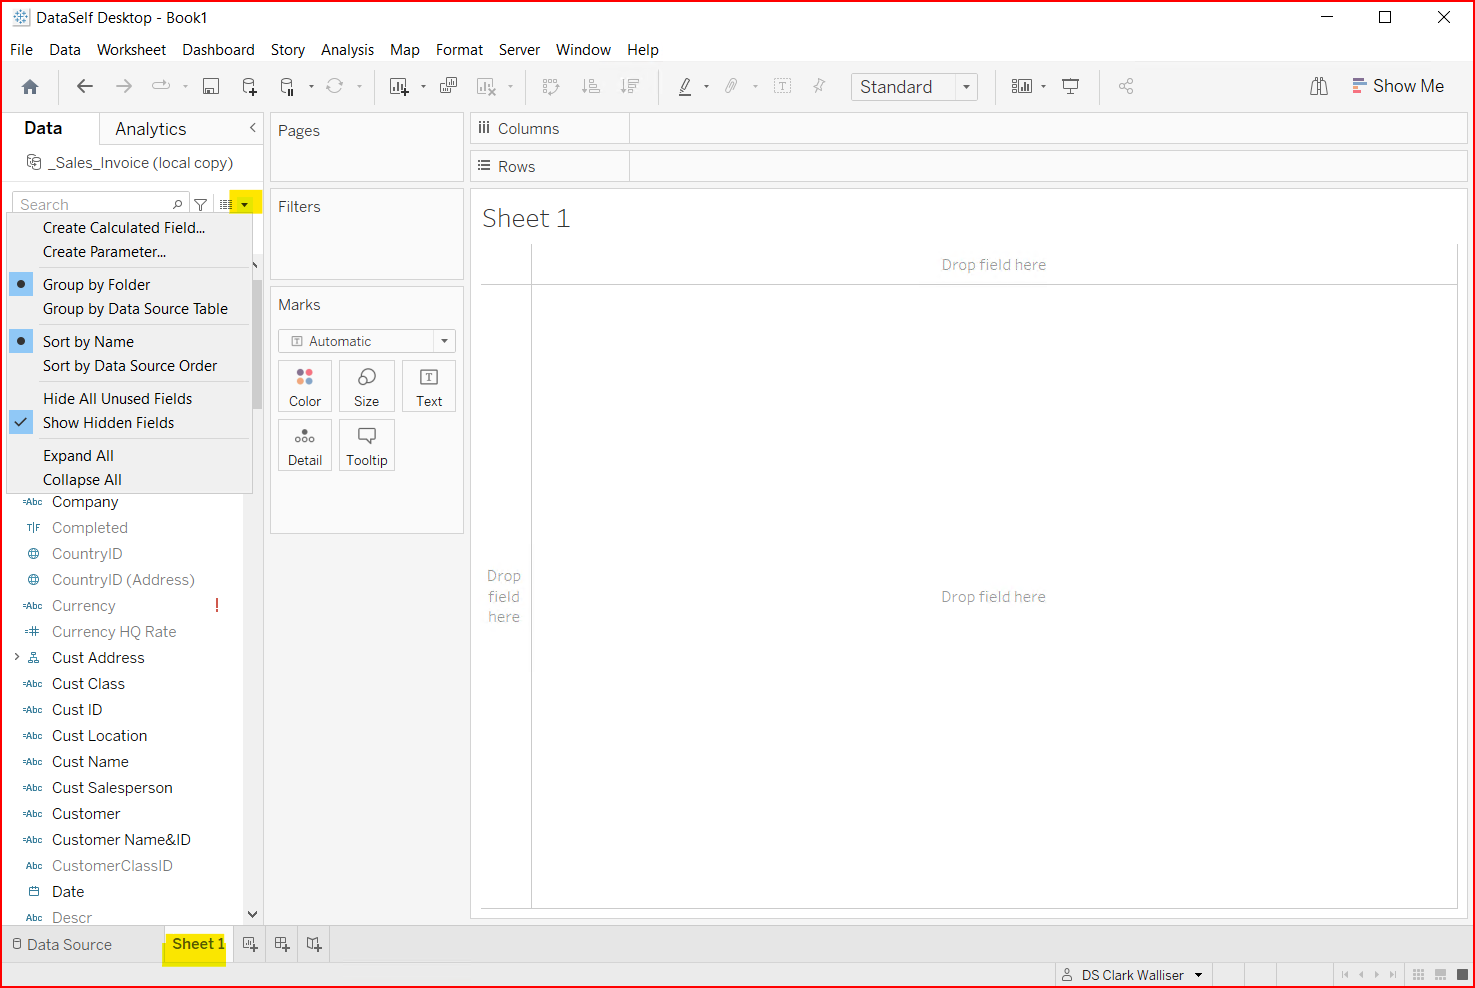
Once you see the fields as expected in the Data Source Edit tab, you can click back to Sheet1 and test the data. Remember to choose the display options you want by clicking on the down arrow to the right of the search box. The typical defaults are Group by Folder, Sort by Name, uncheck Show Hidden Fields.
Note: Any calculated fields you create at the data source level like this become permanent fields for all workbooks when you publish. DataSource calculated fields cannot be modified at the workbook level.
Extract the modified data source
There are multiple ways to do these processes. I am only showing the method I find most convenient.
Sometimes you are only making modifications to existing data, so you don’t need to re-extract. But sometimes you have added a new field that has never been extracted from SQL. In that case, you need to re-extract. If in doubt, re-extract.
To re-extract data with the newest information. On Sheet 1, right click on the data source in upper left and select Extract Data.

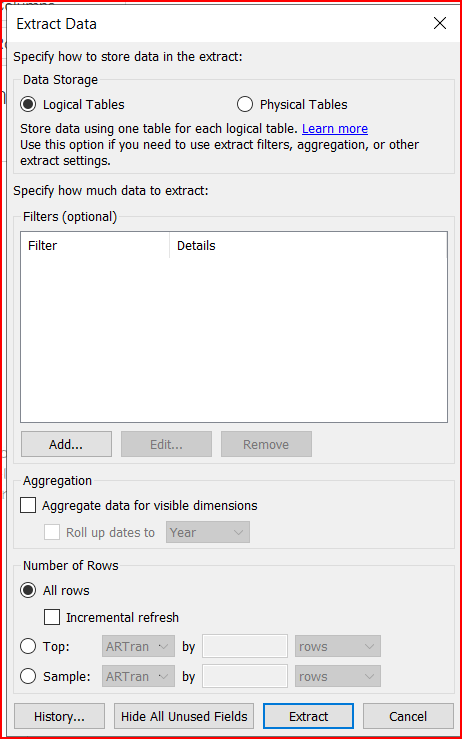
The extract dialog displays with many options you rarely use. Most of these options have already been addressed by the DataSelf ETL+ app, so don’t need to be addressed here. Just click on Extract.
This will run the query pulling data from the SQL data warehouse and creating a copy of the data as a single Tableau data source table.
If the data source has never been extracted or published before, you might get a prompt to save the file as a .hyper file type. You can save it wherever you want because this is a temporary file only, which you can delete after it’s been published to the Tableau site.
Publish the modified data source
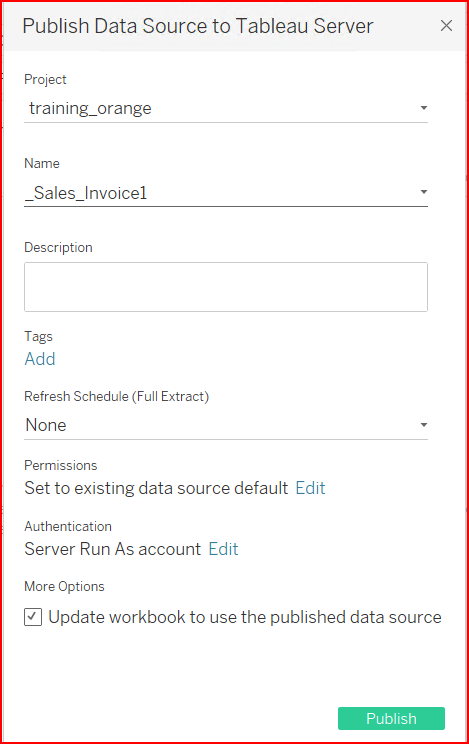
Once the data is ready, you can publish your local data source to the Tableau Site to either overwrite an existing data source or create a new one.
On Sheet 1, right click on the data source and select Publish to Server.
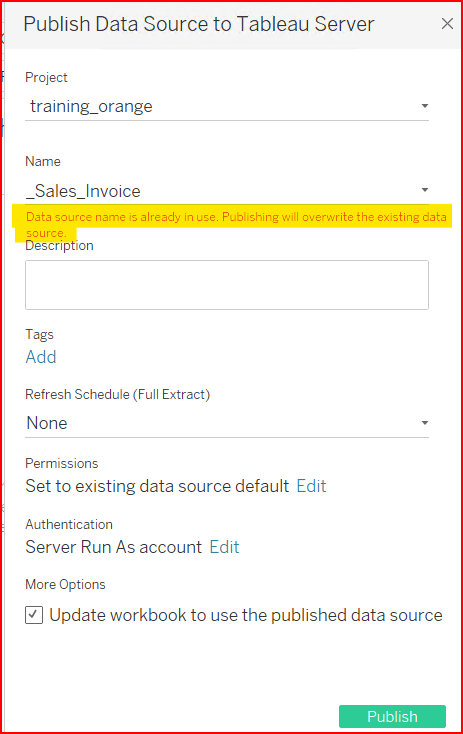
When the publishing process is complete, the Tableau site opens in the browser displaying the data source and fields.
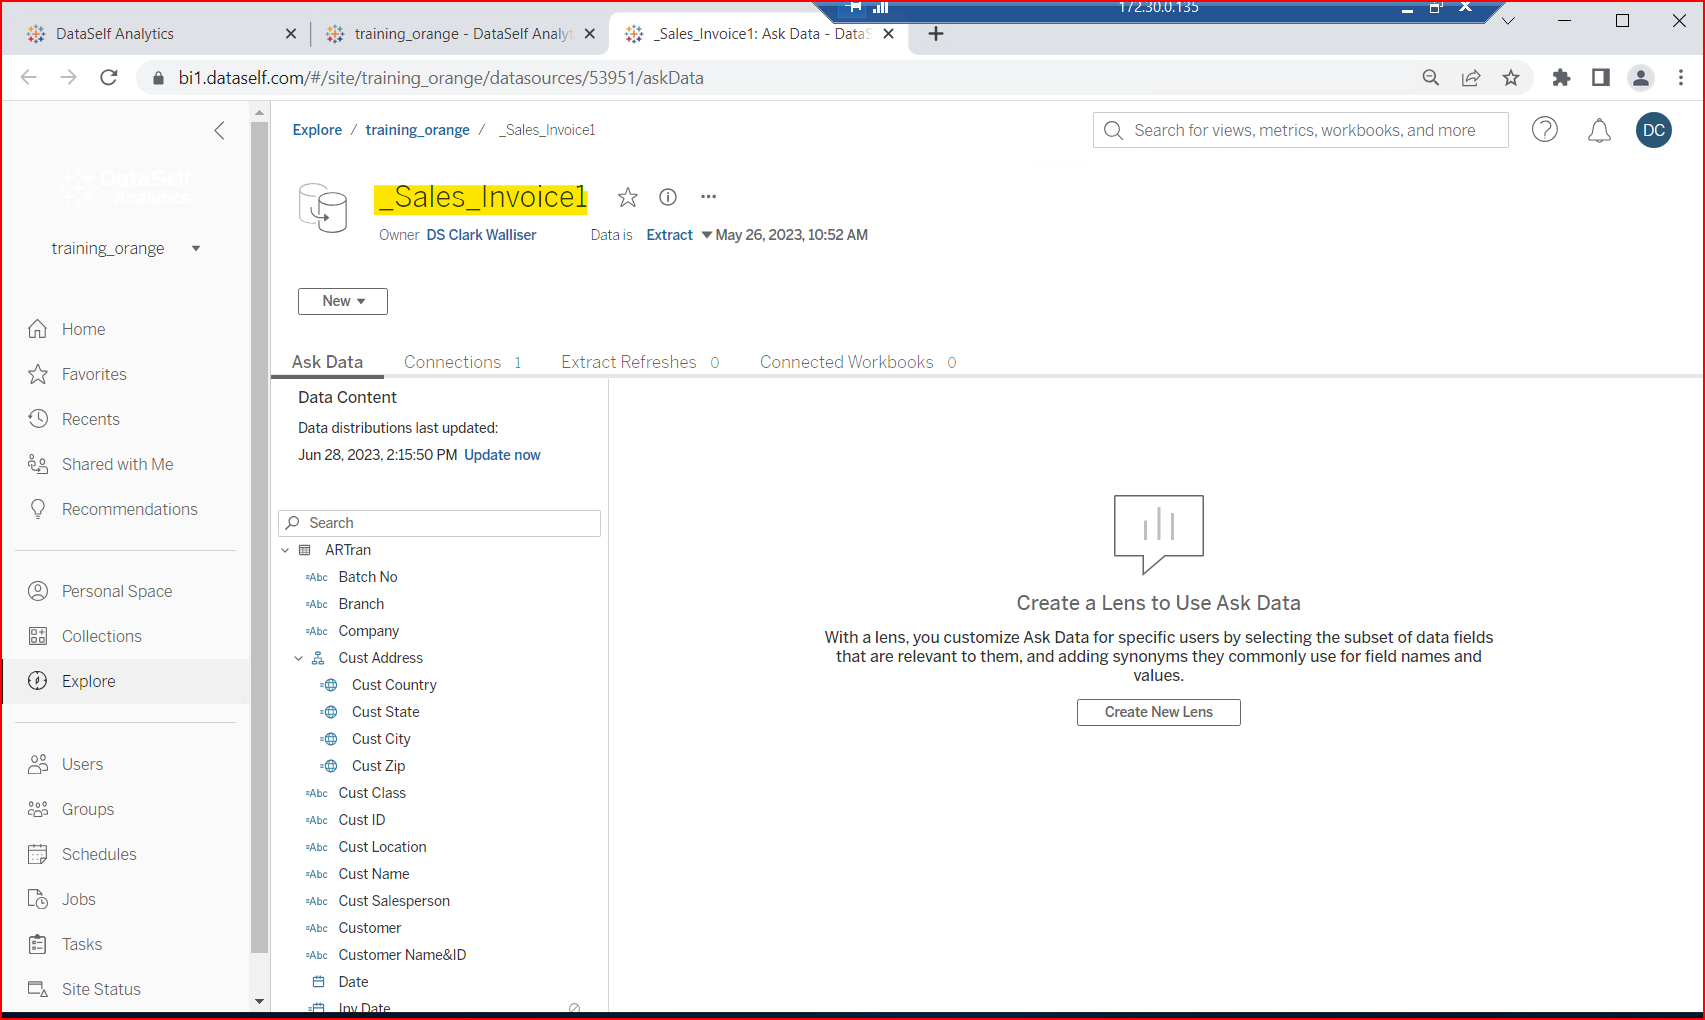
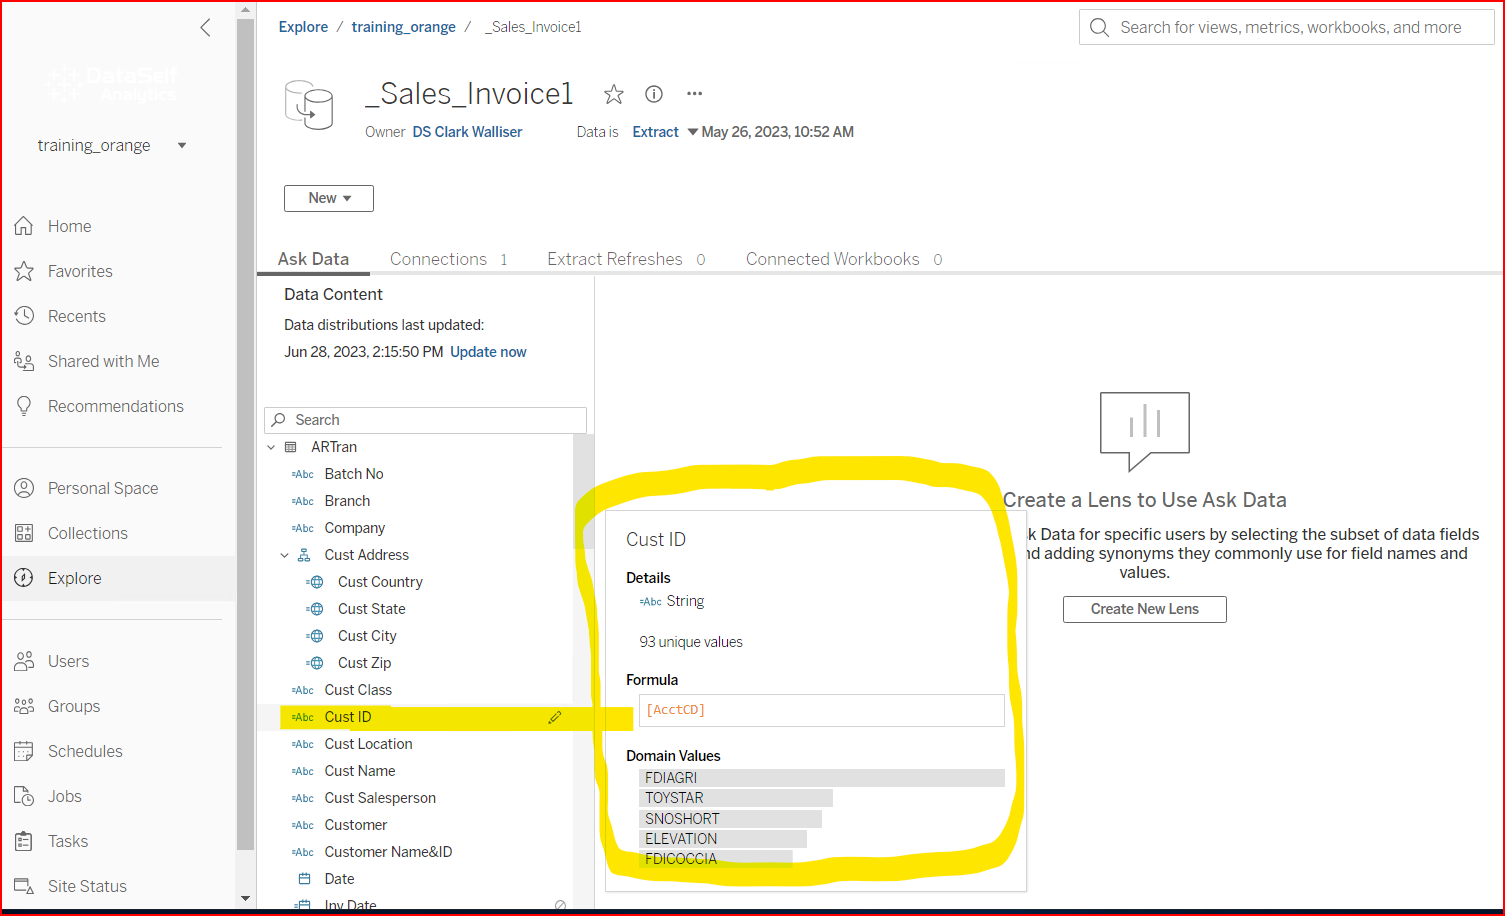
When you hover the cursor over a field, it shows the properties and a sample of the data values.
You can close this browser window, it is only to verify the publishing process is complete.
You are now ready to use your modified, or new, Tableau Data Source in workbooks.