
When you open the Tableau Desktop/Creator app, you see the Connect screen on the left, and the Open screen on the right. We are not doing anything with the Open screen in this exercise.
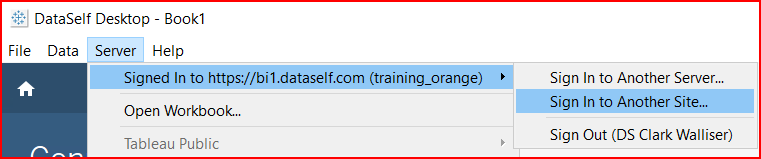
The 1st step is to verify that you are connected to the right Tableau server, so when you publish anything, it goes to the right place. Most users only connect to one Tableau site, so this is not commonly changed.
The 2nd step is to choose what source you want to connect to, an existing Tableau Data Source or to a Microsoft SQL Server database. We will first go through the process of modifying an existing Tableau Data Source (TDS)

Click on Tableau Server. You will see a list of Data Sources on the Tableau site. Double click on _Sales_Invoice to connect to it.

The Processing Request is connecting you to the online data.
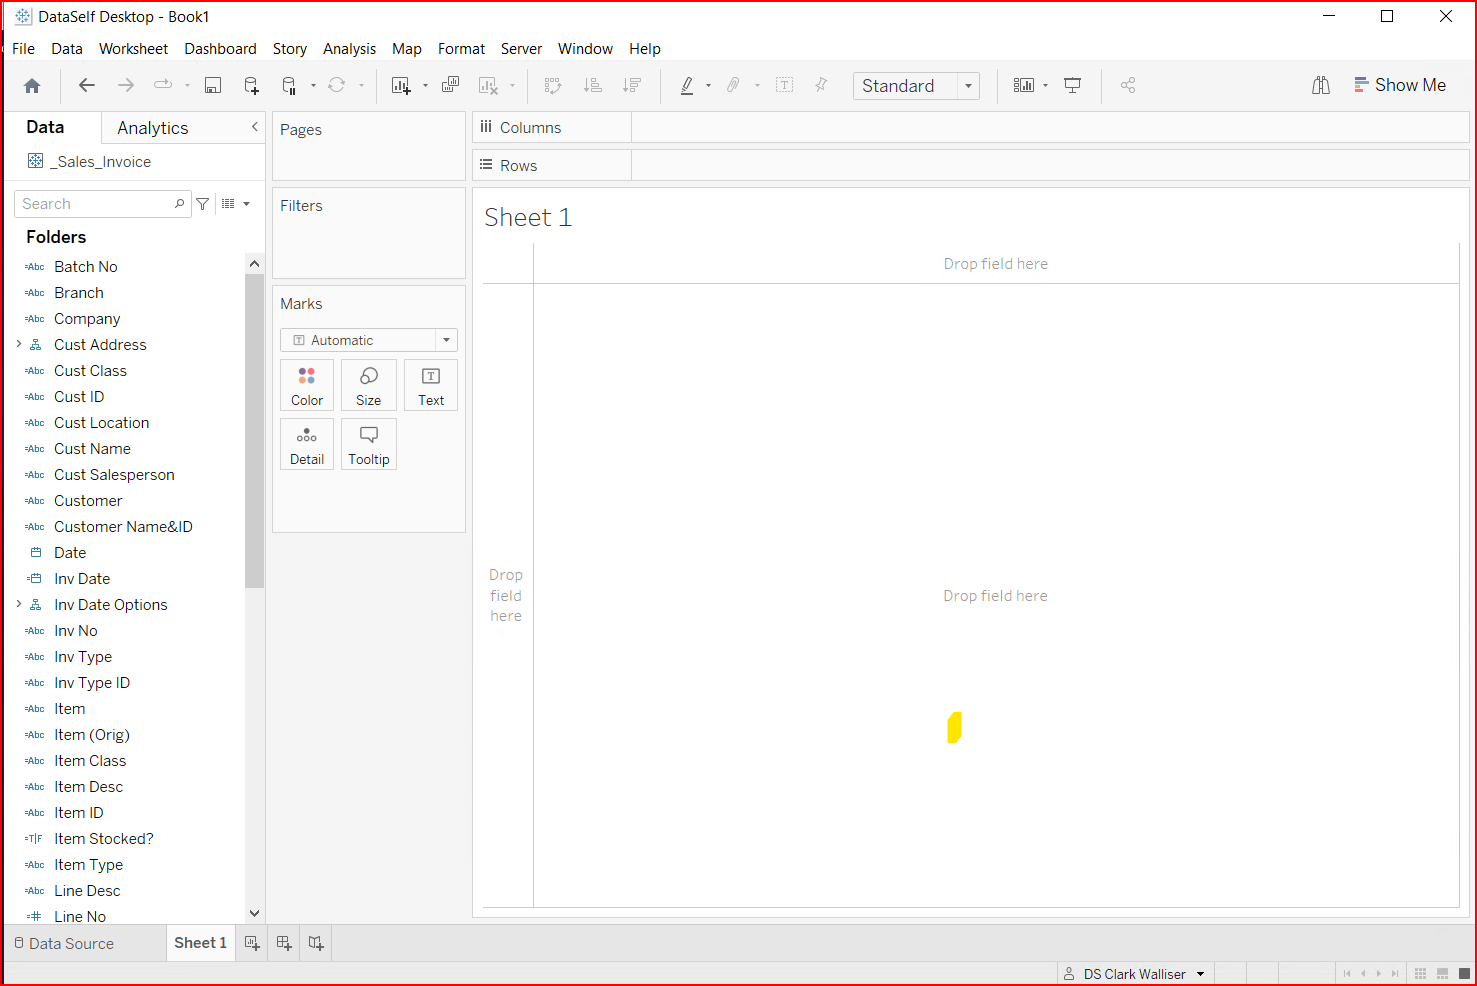
The first thing you see is the workbook editing view. Tableau assumes you are designing a workbook. But that is not our task right now. We want to modify the Tableau Data Source (TDS).
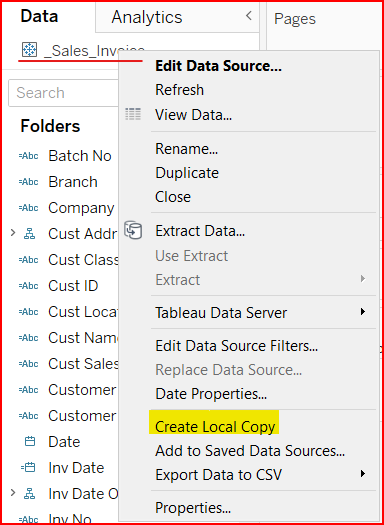
Notice the _Sales_Invoice data source in the upper left. The blue snowflake icon indicates your are connected to an online (cloud) data source. You cannot modify the online data. You must download a copy of the Data Source to your local computer, modify it, then publish the modified Data Source up to the Tableau site.
To download a local copy of the Data Source, right click and select Create Local Copy
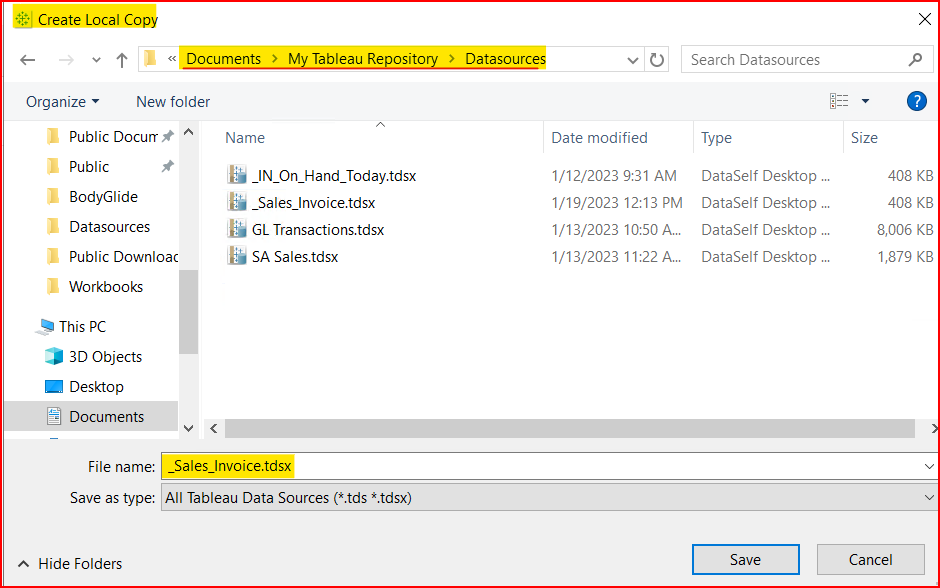
You will get a prompt asking where you want to save the local file. The default is Documents \ My Tableau Repository \ Datasources. But you can save it wherever you want, this is only a suggestion. I often save it to the desktop so it is easy to find, then delete it when I am done and have published it to the cloud.
You will now see two data sources. The one with the two cylinders is the local copy you just downloaded. I usually close the online data source since I don’t need it anymore. Right click and select Close. Then you will see only the local data source.
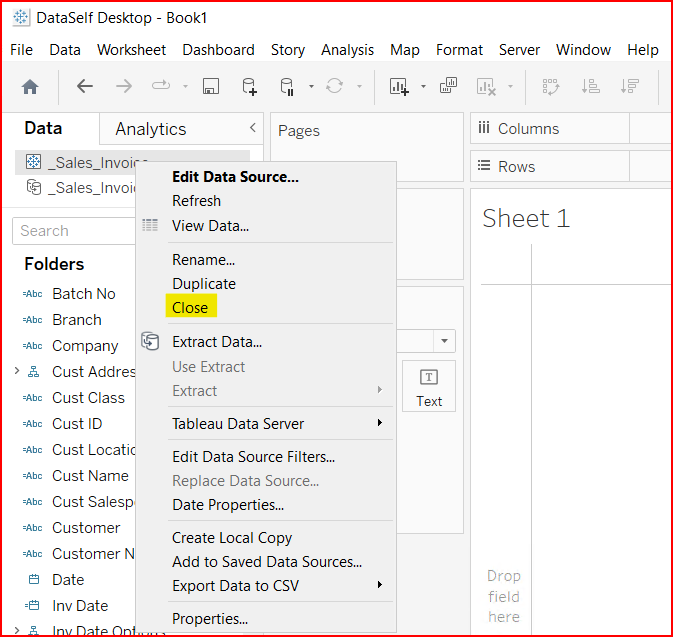
To modify (Edit) the data source, you can either right click and select Edit Data Source, or click on the Data Source tab in the lower left. They both do the same thing.
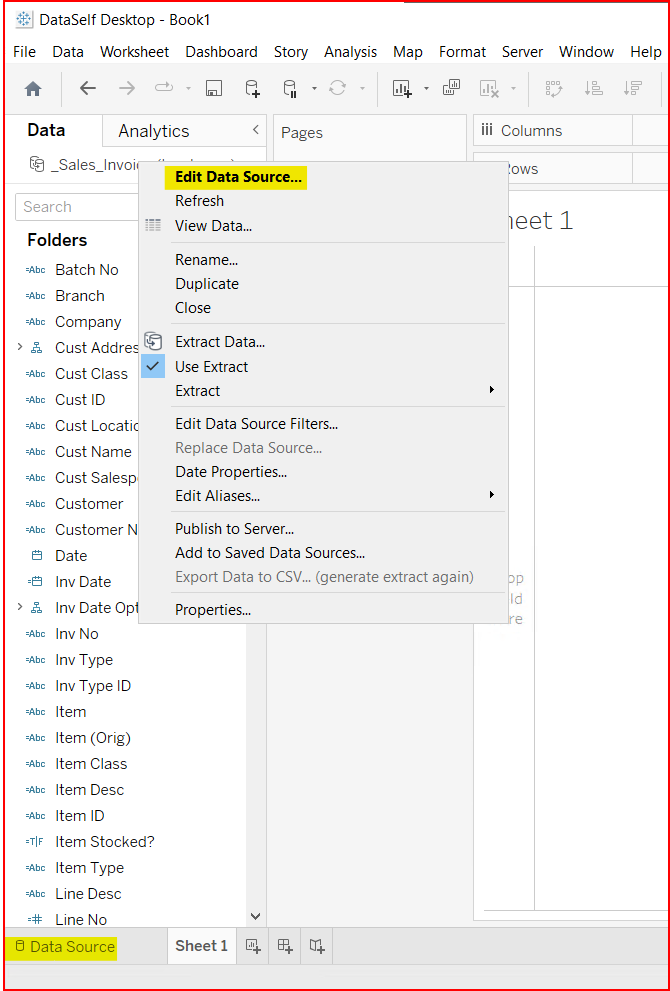
To get to the data source edit screen, Tableau runs the data query from the SQL data source that created this Tableau Data Source.
If you don’t have a connection to the source SQL data base from your computer, or don’t have valid SQL login credentials, then you will run into problems.
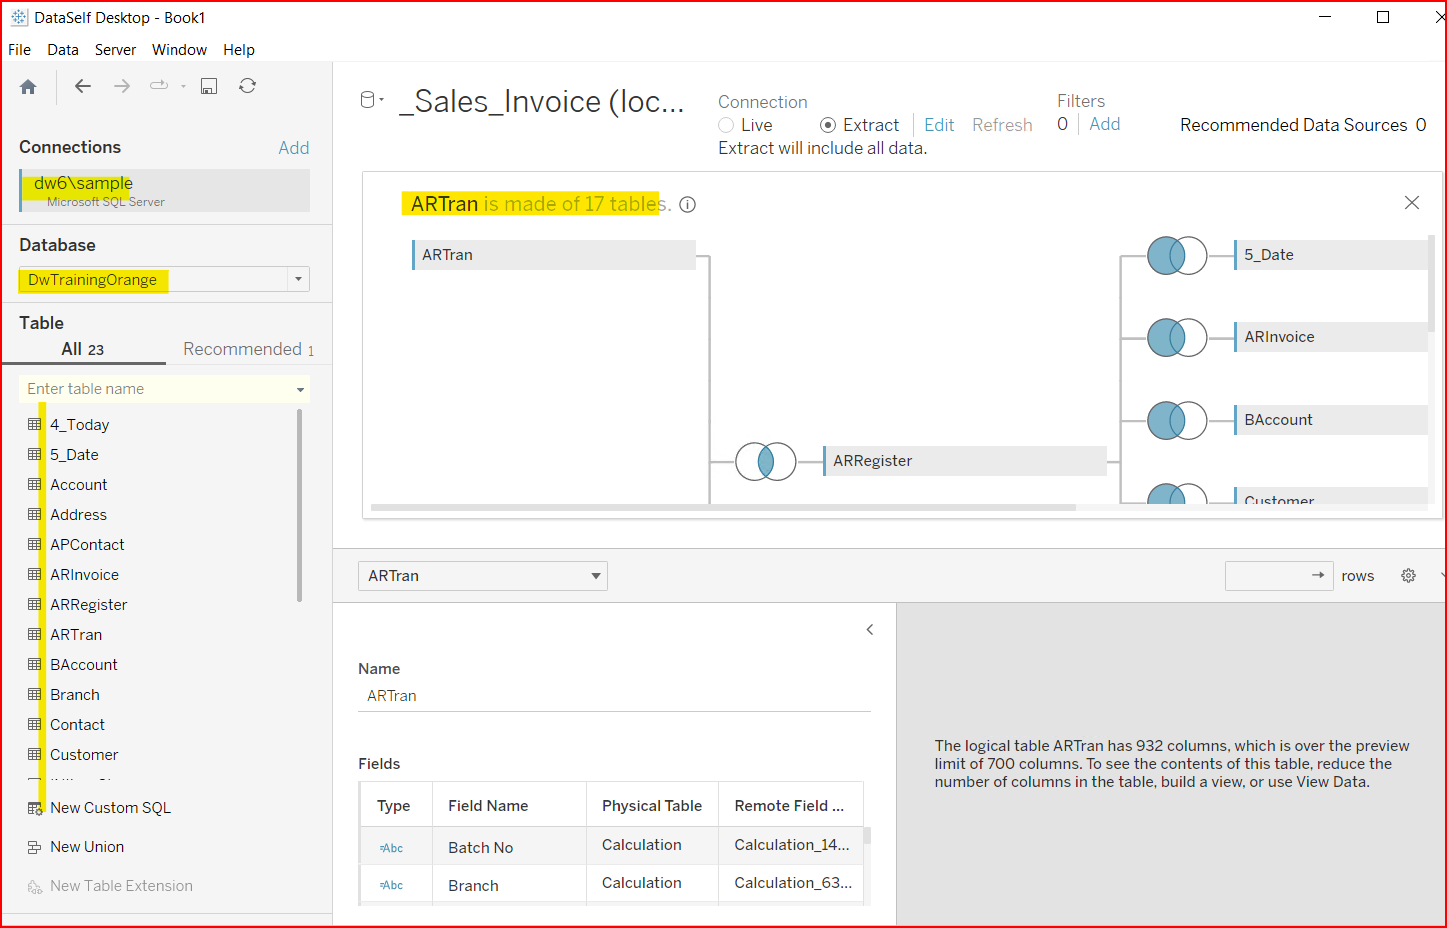
If the connection to the SQL data source is clean, you will see the Data Source screen. The very top displays the Tableau Data Source name, _Sales_Invoice (local copy).
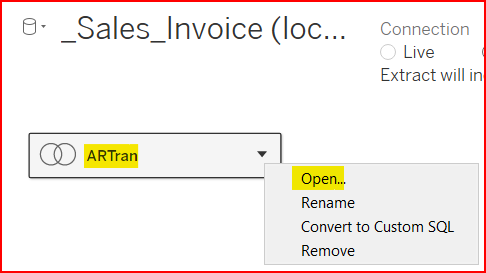
Below that is a data object containing the data structure of SQL tables included. This data object’s name typically is the primary table in the SQL data structure. To see the SQL data structure, right click on the data object ARTran and select Open.
You will get a display message as Tableau runs the query to show the SQL data and structure. This process might be a few seconds, or longer depending on the number of records in the sources.
Then you will see the SQL table structure on the top half, and the data field structure on the bottom half.
This exercise is about modifying the existing data source to show a field you previously added to the SQL data warehouse via ETL+.