
Manually refreshing data from the main page
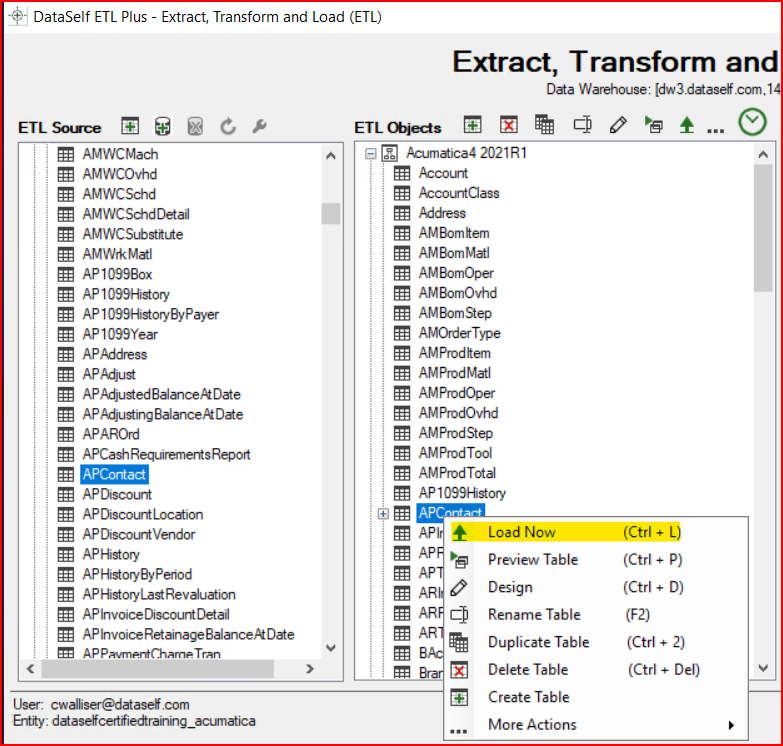
To manually refresh the data, right click on the selected data warehouse table and select Load Now.
This will use the Load type =Load All.
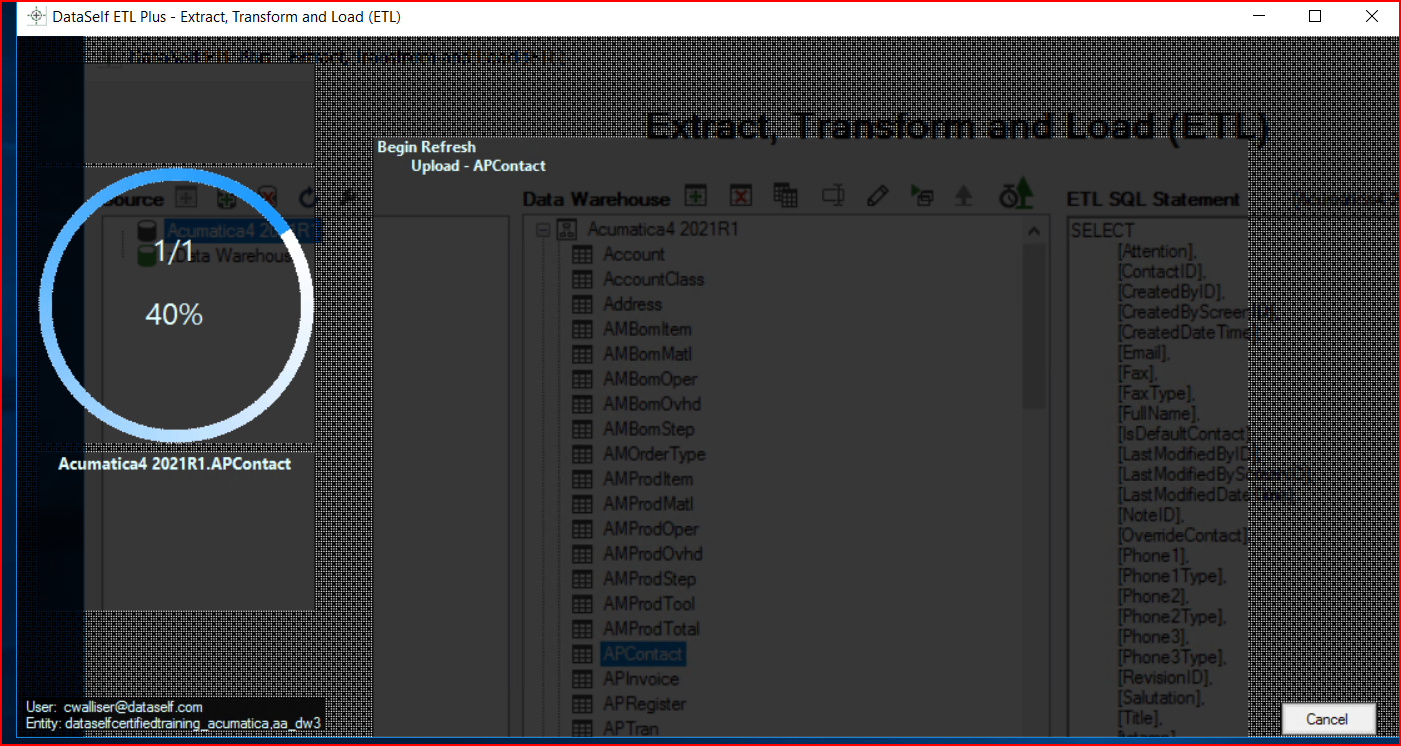
Note: If you have multiple millions of records in your data source then the process might take a long time.
A screen displays showing the status of the load process and if there are any errors. If the first load attempt fails, ETL+ will retry up to 3 times before ending the process.
You can view the activity log by clicking on the notebook icon in the upper right corner of the ETL+ app
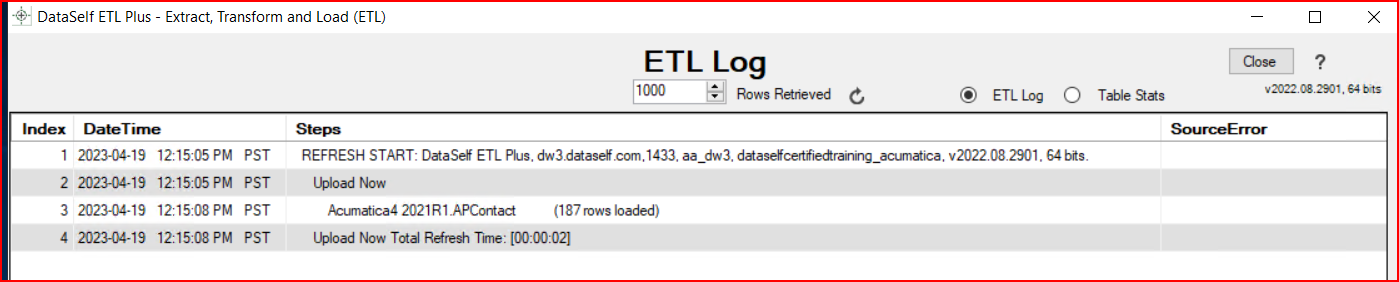
Also see this link in the ETL+ User Guide: ETL+ Logging - DataSelf - Confluence (atlassian.net)
Scheduled Refresh Batch/Job
Related articles: ETL+ Job Page (dataself.com)
ETL+ enables you to schedule automated refreshes using the Refresh Batch function. The icon is different on versions of ETL+. And the options to run the refresh are different on newer versions. But the procedure to schedule a refresh remains same. We will use v2202.08.2901 for our training example.
Note, The assumption is that whoever installed and configured ETL+ in your organization already set up the Refresh Batches and the schedule for running the processes. This focus is on how to maintain the Refresh batches when you add a new table.

When you click on the Refresh Batch/Job icon a new screen displays
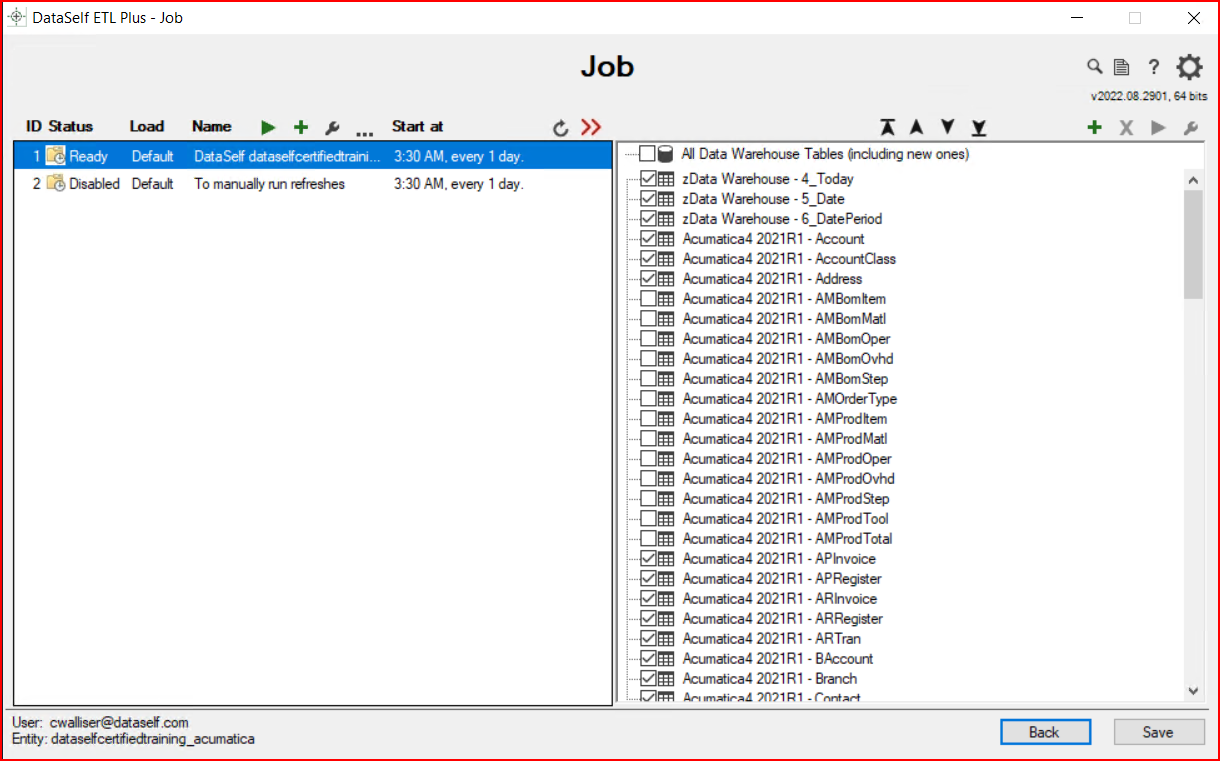
The left panel lists one or more scheduling groups, called batches or jobs. The typical configuration includes two refresh jobs, but this is not required. You might configure the 1st job to refresh only SQL data warehouse tables and the 2nd job to refresh only Tableau data sources. Or you might configure the 2nd job to refresh specific tables in addition to the 1st job refresh.
The right panel lists all the data tables in the data warehouse. A check mark indicates the tables that will get processed in this refresh job.
In the example above you notice not all the checkboxes are marked. The unmarked ones will not be refreshed in this job but might be marked to refresh in a different job. Each job can be run at different times and different frequency. See on the lower left panel the start date, time, and frequency for Job 1.
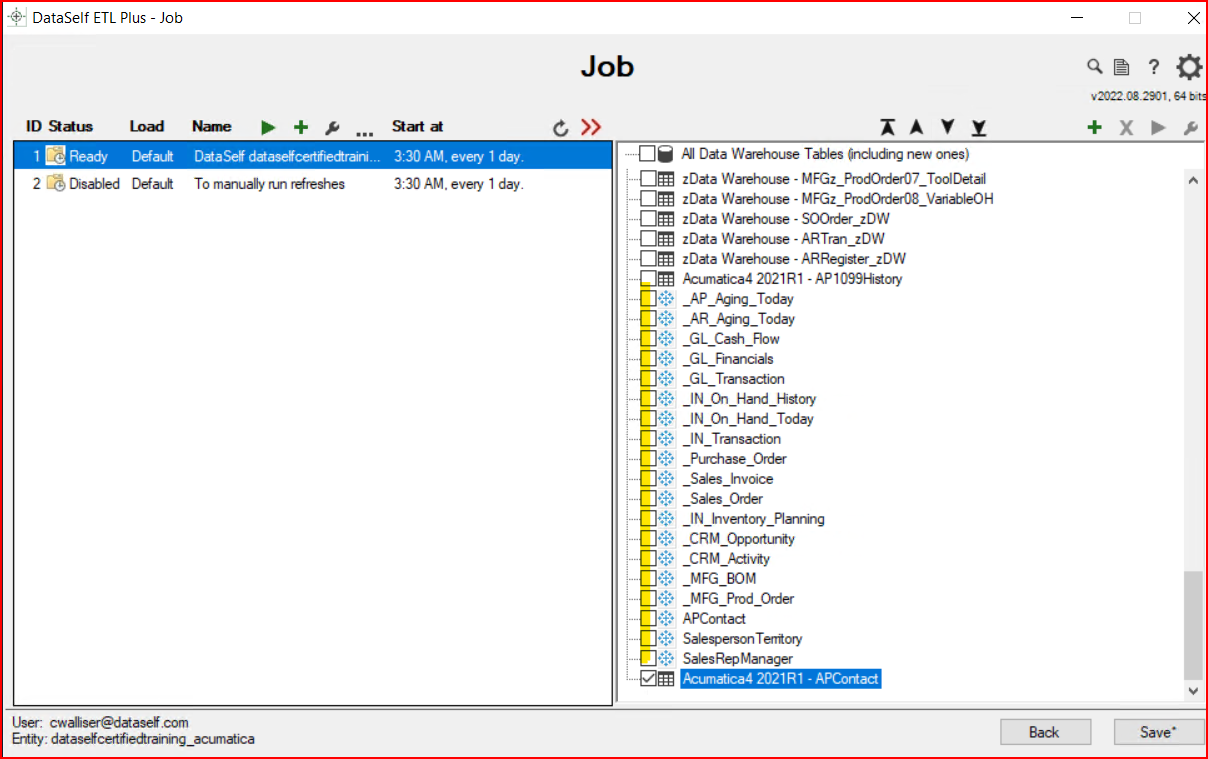
There are two types of data to refresh: SQL data warehouse tables and Tableau data sources.
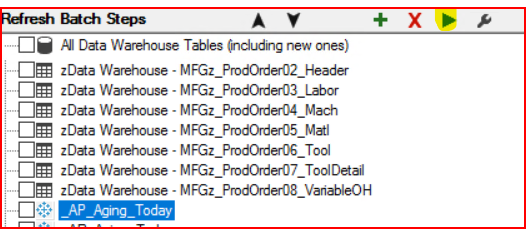
In the example below, the blue snowflake icons represent Tableau data source refreshes. These Tableau Data Sources were previously created with DataSelf Desktop. These refresh scripts run the original refresh process stored on the Tableau server. In this example none of the Tableau refreshes are checked, which means none of them will be refreshed in this batch. In real life you would validate that they are being refreshed in one of the other batches, or that there is a reason for them not being refreshed.
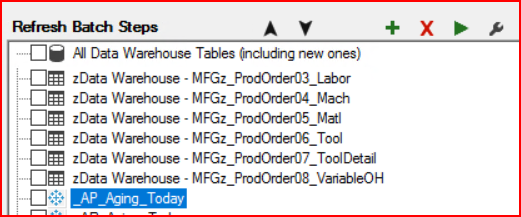
The last record in the right panel is the newly created APContact SQL data warehouse table.
ETL+ adds new records to the end. You can manually re-arrange them as you desire.
Note, the ETL+ refresh processes in the order the files are listed on the right side. In the example below, the APContact SQL table refreshes last, but the refresh for the Tableau APContact data source is further up the list, so it runs before the SQL data is refreshed. This could be a problem.
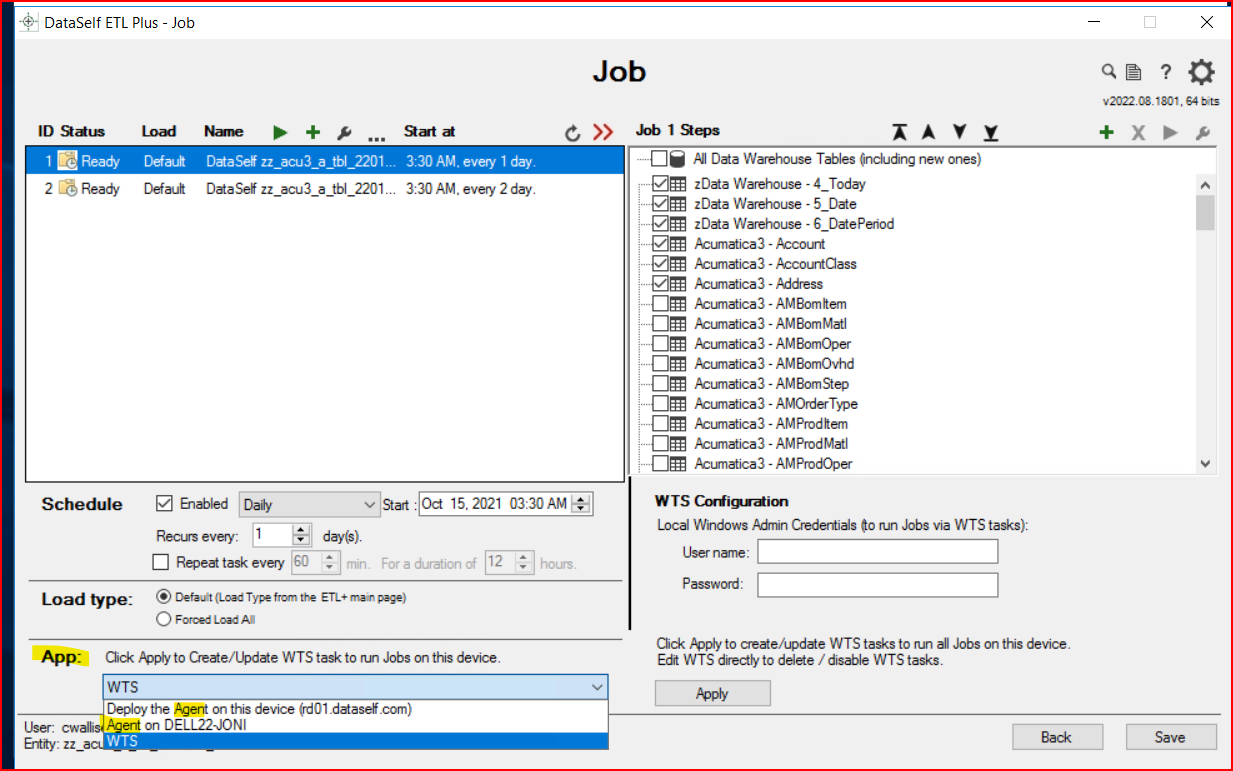
Starting with version 2202.08.2901, you can use either the DataSelf ETL+ Agent Scheduler or the Windows Task Scheduler (WTS) on the machine where ETL+ is installed to run the refresh processes. The ETL+ Agent enables remote editing of the refresh schedule. WTS (Windows Task Scheduler) requires a person be locally connected to the server running the Windows Task Scheduler app.
To see the configuration, highlight the selected job and click on the Properties (Wrench) icon.
In the example below, we added a new SQL data warehouse table, APContact. Now we want to mark it checked to include it on the schedule. Whether you add it to batch 1 or 2 is up to your organization's strategy for creating multiple refresh batches.

Note that there is no Tableau refresh record for the APContact. That will be configured in the DataSelf Desktop section, then added to the refresh batch later.
Manually update the Refresh Batch/Job
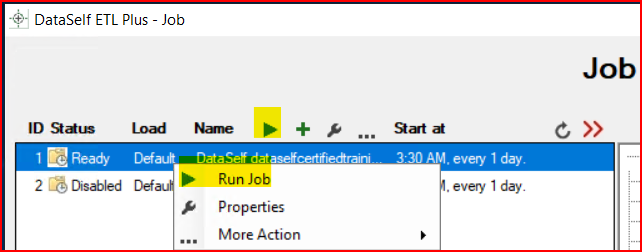
You can manually run a batch/job, or a single Tableau Refresh script, at any time.
To run a batch/job, click on the green arrow to the left of the batch name. This will run the process immediately for all checked records in that batch. You have the option in the Load Type section to force to load all records rather than the default Load Type set on the main screen.
Be aware of the impact on your source system. Refreshing millions of sales invoice records could impact source system performance.

Manually update a single Tableau Refresh script
If you have previously created a Tableau refresh process with DataSelf Desktop and added the script to the refresh batch, then you can run it manually at any time.
To manually run a Tableau refresh script, highlight the selected record and click on the green arrow in the upper right.
In the screenshots below, see the

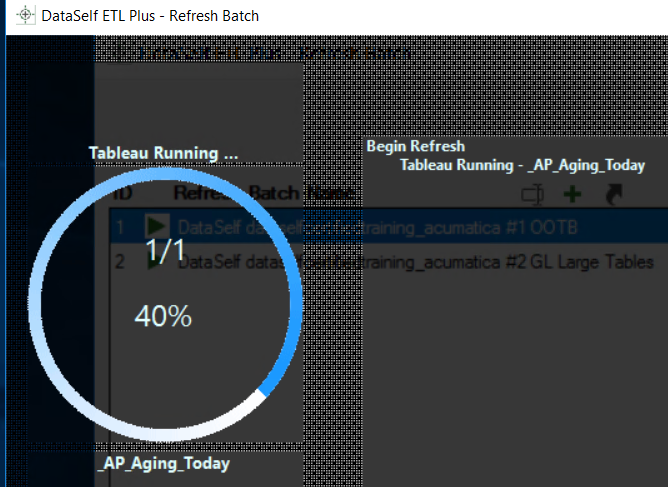
After the refresh process completes, the DataSelf/Tableau shows the new Refresh/Extract date
