
-
Before doing this Setup Client installs the Sage 100 Workstation on the server that will host ETL+. The workstation setup program installs the MAS 90 ODBC driver into the windows system.
-
Open the ODBC Administrator/ODBC Data Sources.
You can do so by clicking the Windows Start Menu and then typing ODBC. Pick the 32 bit or 64 bit version based on what version Sage 100 is.-
Sage 100 installs the 32 bit ODBC by default. To install the 64 bit ODBC driver, open the Sage 100 Installation file (or DVD) and select the Productivity Applications menu. You will see the choice to install the 64 bit ODBC driver.
-
The benefit of this is higher data transfer speed and the ODBC can work in either 32 or 64 bit mode

-
-
This screen will open. Choose the System DSN tab and click on the Add button.
NOTE: Sage 100 installs a User DSN (SOTAMAS90), but DataSelf requires a System DSN
Use the configuration information from the SOTAMAS90 User DSN as the template for creating the System DSN.

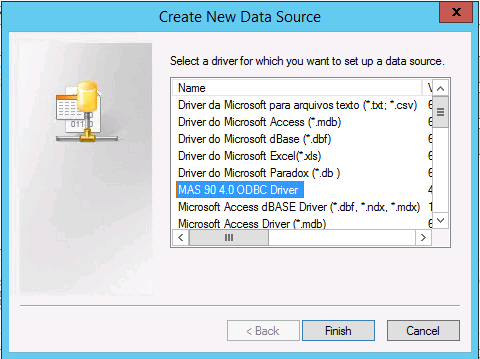
3. This screen will open. Choose the selected Driver below and click the Finish button.
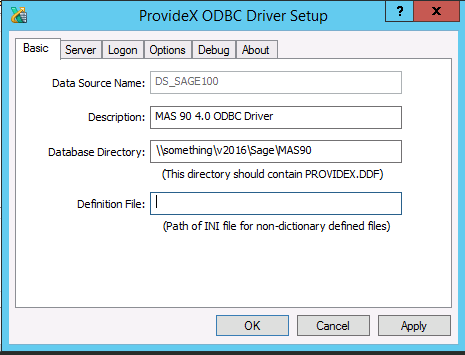
4. This screen will open. Data Source Name should usually be DS_SAGE100, but can be any name that will be clear to the later users. Fill in as below, copying the configuration info from the SOTAMAS90 User DSN (since Sage 100 auto configured it).
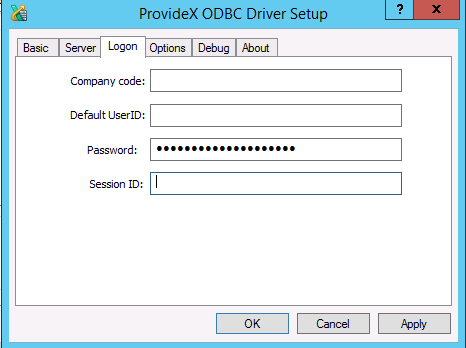
5. Click on the Logon tab. The client needs to provide the Company code, UserID and Password.
NOTE: This Sage 100 UserID must have sufficient ODBC permissions to read required tables and fields.
ODBC security is an optional setup configuration in Sage 100.
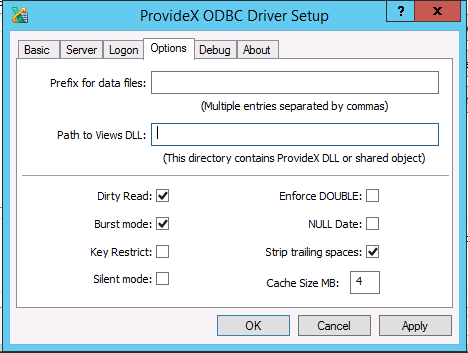
6. Click on the Options tab. The client needs to provide Prefix for data files and Path to Views DLL.
Or use the info from the SOTAMAS90 User DSN . Fill in the rest as below. Click the Apply button.
-
Null Date.
NOTE: If the ETL process fails with an error message about bad date fields, you can optionally check the NULL Date field.
This will allow records with NULL date values to be extracted.
7. Click on the Debug tab.
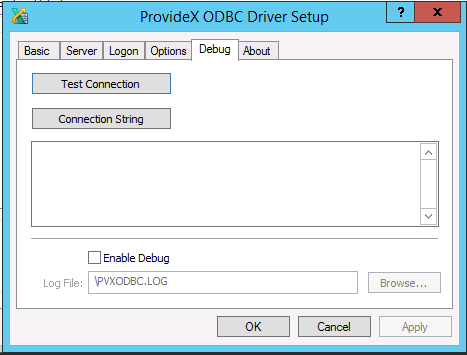
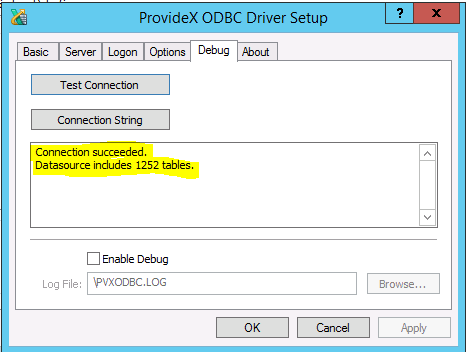
8. Click on Test Connection button. Similar to what you see below should appear. This test must succeed. Click the OK button to finish.
This article
In this section
Related Content