ETL+ for OData
DataSelf uses the OData protocol for Acumatica and supports OData for other data sources.
See also ETL+ for Acumatica Cloud (OData)
OData (Open Data Protocol) is an ISO/IEC approved, OASIS standard that defines a set of best practices for building and consuming RESTful APIs. – odata.org
Installation Checklist
Connecting to OData
Connecting to source data stored on an OData source.
If you haven’t installed ETL+ yet: ETL+ Deployment Instructions.
Login to ETL+ (help here).
Adding a new OData source: On ETL page’s left panel, click
Add Source->OData.Maintaining an OData source: On ETL page’s left panel, right-click the OData source →
Properties.On the
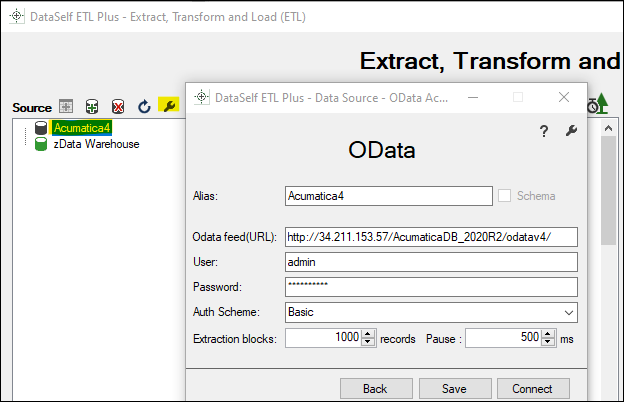
ODatapage:Alias is automatically populated, but you can customize it.
Odata feed (URL). Enter the OData URL.
User and Password. Enter the username and password.
Authentication. Select an option such as
Basic.Extraction blocks: By default, leave it at 5000 records.Pause: By default, leave it at 500ms.

g.Click Connect.
You’ll get back to the ETL page and see tables under the OData source on the left panel.
Mapping and Loading Tables
To view tables available from your OData source on the left panel, right-click the Source source →
Refresh.To map a OData source table to the data warehouse,
double-click its nameon the left panel, or right-click on it →Add Table.You’ll now see the table added/mapped to the center panel.
To preview its data, right-click the table on the center panel →
Preview.To load its data to the data warehouse, right-click the table on the center panel →
Load Now.Click the
Logicon (top right) to view data load results. Log page help here.
Schedule the Data Load
On the ETL main page, click
Job(top right icon on the center panel).The Job page usually comes pre-configured to your source system(s).
Overview this page’s configuration. On the right panel, feel free to uncheck tables and Tableau extracts that don’t apply to your reporting needs.
Run a Job now (optional): click the
Run Job(play icon) on the left panel.To schedule the data load (optional):
Select a
Job→Job Properties(wrench icon) → configure the schedule panel →Save
Click
Close->Close.
Testing
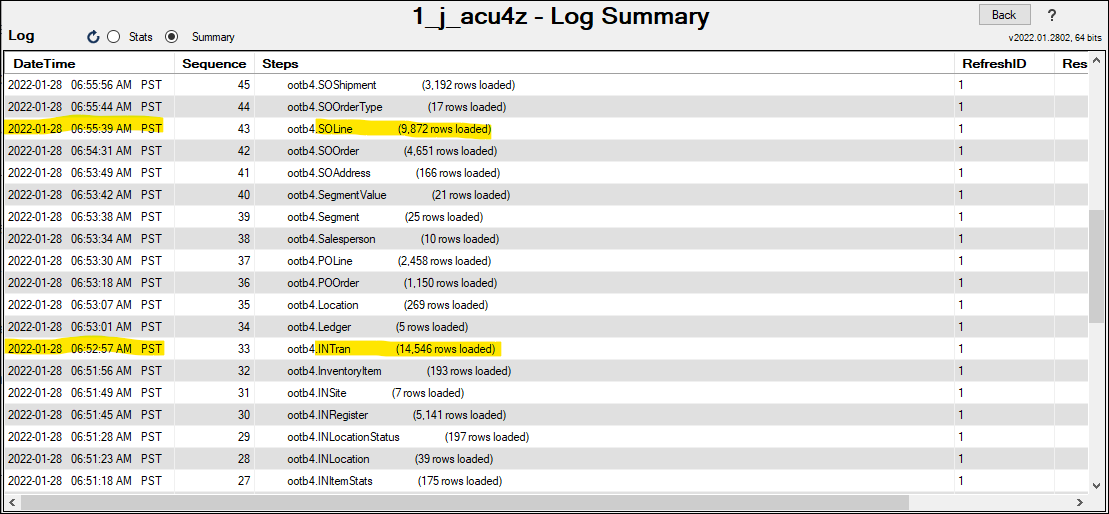
After ETL+ has loaded your OData tables, this is to check if the data extraction process finished successfully and row count per extracted table matches with your OData tables.
Steps
Login to ETL+ (help here).
On the ETL main page, click the top-right
Logicon. Log page help here.Scroll down on the log page and double-check that no table load failed, and the row count matches with the source OData tables. Following is an example highlighting two tables from a sample OData source and their loaded row count.

