The Text File source driver can import .csv format files.
ETL+ Issues Importing from a CSV, Text file
Installation Checklist
Connecting to CSV and Text Files
Currently, these must be comma delimited text files, with the first row with Column headers.
-
If you haven’t installed ETL+ yet: ETL+ Deployment Instructions.
-
Loginto ETL+ (help here). -
Add new .csv files: Select
Add Source> Text on the -
Maintain a text source: Right-click the text source object >
Properties. -
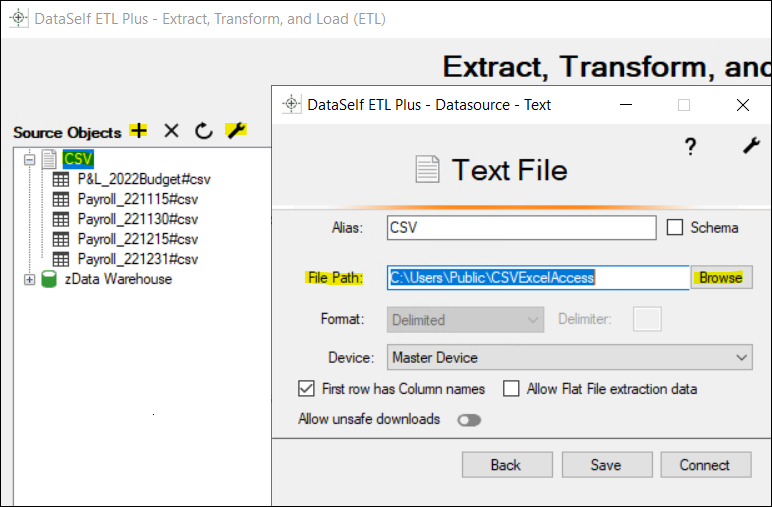
On the Text File page:
-
Aliaswill be automatically populated, but you can customize it. -
File Path:-
Enter a local file path containing the .csv or .txt files or …
-
Use Browse or …
-
Enter an internet URL address.
-
-
Device: Leave it as it by default. -
Allow unsafe downloads: Toggle this on when downloading the CSV from a website that is not SSL-based. -
Click
Connect. -
Supported Excel formats: TXT, CSV.
-
-
You’ll get back to the ETL page and see tables under the selected text source on the left panel.
Mapping and Loading Tables
-
To view tables available from a text source on the left panel, right-click the text source →
Refresh. -
To map a text table to the data warehouse,
double-click its nameon the left panel, or right-click on it →Add Table.-
You’ll now see the table added/mapped to the center panel.
-
-
To preview its data, right-click the table on the center panel →
Preview. -
To load its data to the data warehouse, right-click the table on the center panel →
Load Now. -
Click the
Logicon (top right) to view data load results. Log page help here.
Schedule the Data Load
-
On the ETL main page, click
Job(top right icon on the center panel). -
The Job page usually comes pre-configured to your source system(s).
-
Overview this page’s configuration. On the right panel, feel free to uncheck tables and Tableau extracts that don’t apply to your reporting needs.
-
-
Run a Job now (optional): click the
Run Job(play icon) on the left panel. -
To schedule the data load (optional):
-
Select a
Job→Job Properties(wrench icon) → configure the schedule panel →Save
-
-
Click
Close->Close.
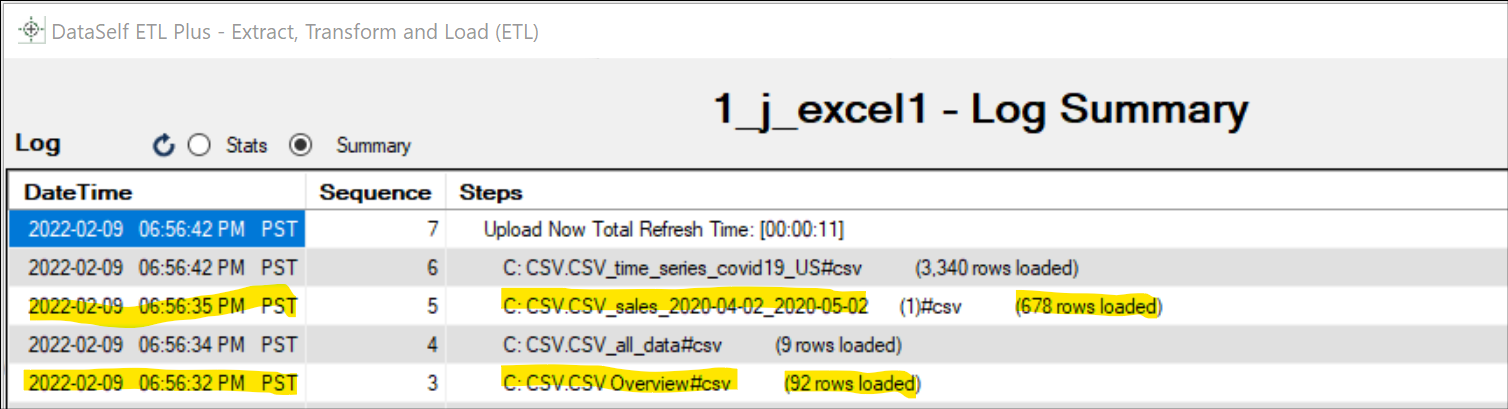
Testing
After ETL+ has loaded your text files, this is to check if the data extraction process finished successfully and row count per extracted table matches with your text tables.
Steps
-
Login to ETL+ (help here).
-
On the ETL main page, click the top-right
Logicon. Log page help here. -
Scroll down on the log page and double-check that no table load failed, and the row count matches with the text tables. Following is an example highlighting two tables and their loaded row count.