
v2026.01
Important: The following assumes you’ve already received your ETL+ email registration. Please contact your DataSelf Seller if you haven’t yet.
-
ETL+ Pre-Installation checklist: DataSelf ETL+ Desktop Pre-Installation
-
This step is required if your public IP hasn’t been whitelisted yet: Contact support@dataself.com to whitelist your public IP.
-
Download the ETL+ Installer from DataSelf ETL+ Desktop Download Links and save it in any Windows folder.
-
Run the ETL+ Installer (DataSelfETL_Setup.msi) and follow the prompts.
-
We recommend choosing the default options.
-
Log on DataSelf Windows Service as prompt: This prompt determines the Windows user that will run the DataSelf Windows Service.

-
Select Local System Account if the installation will not extract data from sources that require Windows Authentication. For more see NOTES below.
-
Select This Account and enter the credentials for a password-not-to-expire user with local Windows Admin rights with read rights to your source system(s). The user can be a local or domain user with local Windows Admin rights or a service account other than the Local System Account.
-
Click Confirm.
-
-
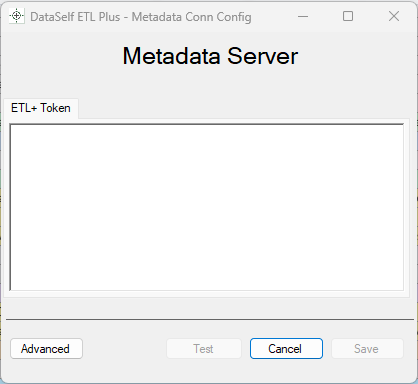
Metadata Server:
-
Copy/paste your ETL+ Token into the box below: Check for an email from DataSelf to find the token.
-
Click Test, if successful, click Save.
-
Wait a few seconds until DataSelf app closes completely.
-
-
Done.
-
-
Restart your new DataSelf Windows Service.
-
Go to your Windows Services → right-click DataSelf Windows Service → Restart.
-
-
Run DataSelf ETL+ from your Desktop shortcut or from your Start → DataSelf ETL Plus menu.
-
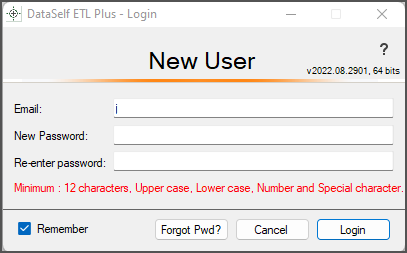
New User page – ETL+ User Credentials:
-
If you used the new DataSelf self-service deployment form:
-
Use the ETL+ credentials you created/assigned during the deployment form.
-
Skip to step 8.
-
-
Otherwise, use the following instructions:
-
Copy the Email address from the Product Registration Email you received during Pre-Installation into Email.
The email address serves as the ETL+ ‘user name’. -
Press
Tabor go to the next field. -
Enter a new ETL+ password for new users (or enter your existing ETL+ password) into New Password and Re-enter password. New passwords must meet the minimum requirements stated on the window.
-
Press
Tab.
-
-
If you have access to multiple ETL+ entities, select the desired one from the Entity dropdown list.
-
Click Login.
-
-
Connect to your Source System and Set up the Scheduler.
-
Click here to Configuring & Using ETL+ for the First Time
-
DataSelf Windows Service - Configure for Auto Start – ensures that DataSelf Windows Service starts up every time Windows boots up.
NOTES
-
Log on DataSelf Agent Service as window. Local System Account vs. This Account.
if the ETL+ Agent can’t run ETL+ Jobs with the Local System Account then changing the account to a dedicated service account (or the account of a Win Server Admin user) should address the issue. -
See also https://learn.microsoft.com/en-us/windows/win32/ad/the-localsystem-account
Next Steps
See Configuring & Using ETL+ for the First Time
Your ETL+ out-of-the-box deployment should be all set!
Related Pages
-
Upgrading your ETL+ Desktop – How to install a ETL+ upgrade/ update your current version of ETL+.
Keywords:
Your email, Entity ID, Public IPv4 and Optional 2nd Public IPV4. IP whitelist, whitelisting
DataSelf ETL Plus, ETL+, Installation, Deploy, Deployment, Advanced Analytics, Acumatica, Sage 100, Sage 300, Sage Intacct, Sage X3, Sage CRM, NetSuite, Salesforce.com, Dynamics Business Center, BC, CRM, NAV, GP, D365