
Deploying ETL+ to connect with Acumatica with OData.
ETL+ Deployment for Acumatica Cloud
Steps 1 and 2 can be covered under 30 minutes.
-
Click here to fill out the DataSelf Analytics for Acumatica Deployment Form.
-
User Access: Click here for instructions to grant DataSelf data extract access to your Acumatica data source.
-
Wait for a DataSelf email notifying you that your DataSelf deployment has been completed.
Level 1 Testing (optional)
The optional Level 1 Testing checks if the data extraction process finished successfully and if the overall row count per extracted table matches Acumatica’s replicated table row counts.
-
If you haven’t installed ETL+ on your Windows computer yet: ETL+ Deployment Instructions.
-
Login to ETL+ (help here).
-
Click Log on the ETL+ Extract, Transform and Load (ETL) Page
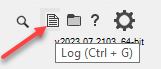
For more about the Log page click here.
-
Scroll down the log page and double-check that no table load failed and that the row count matches the source tables in Acumatica.
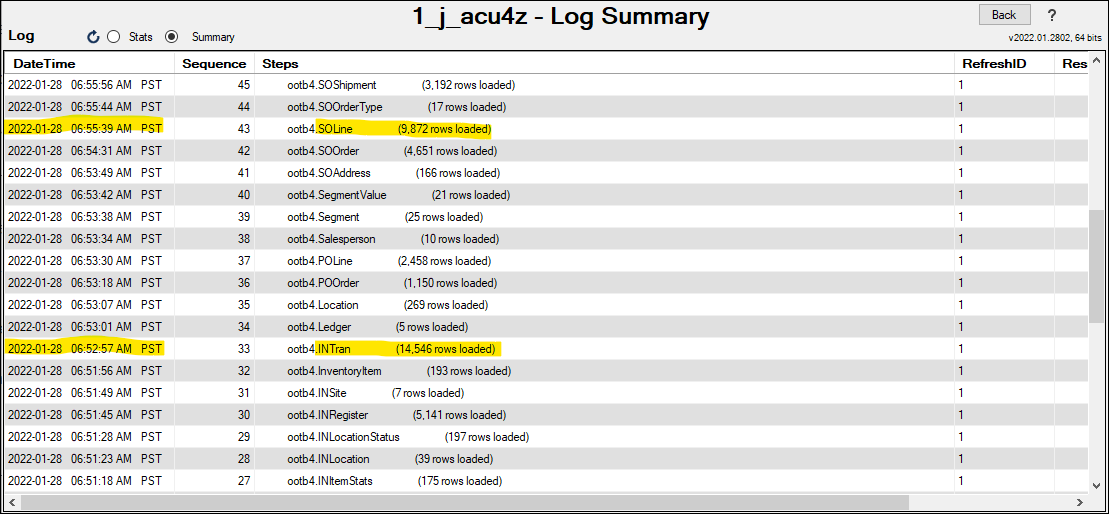
In most cases, the out-of-the-box DataSelf solution is all set once this test is successful.
Troubleshooting – see Acumatica OData Extraction Issues / Troubleshooting
Popular ETL+ Tasks
-
To add a new Acumatica table into DataSelf’s data warehouse: On the ETL main page, Source Objects panel, expand the Acumatica header, right-click the table → Add Table.
-
To refresh a table (load its data) into DataSelf: On the ETL main page, Target Objects panel, right-click the table → Load Now.
-
To refresh the whole DataSelf solution: On the ETL main page, click the Job icon on the Target Objects panel, right-click a Job (usually Job #1) → Run Job.
-
To change the schedule of a DataSelf Job: On the ETL main page, click the Job icon on the Target Objects panel, right-click a Job (usually Job #1) → Properties → change the settings → Save.
ETL+ OData Maintenance
The following is to update the OData settings, such as credentials or OData URL.
-
Login to ETL+ (help here).
-
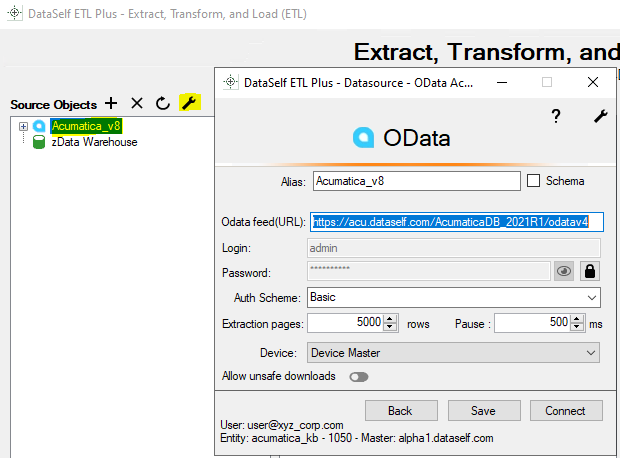
Right-click
Acumatica> Properties on the Source Objects pane -
Alias is automatically populated, but you can customize it.
-
Odata feed (URL). Enter the Acumatica OData URL. Click here for instructions.
-
User and Password. Click the lock icon to clear the credentials boxes, then enter the username and password to your Acumatica. Click here for instructions.
-
Authentication. Set it to
Basic. -
Extraction blocks: By default, leave it at 5000 records. -
Pause: By default, leave it at 500ms. -
Device: By default, leave it as Master Device.
-
Allow unsafe downloads: This is rare. Only toggle this ON if your Acumatica doesn’t have an SSL.
-
g.Click
Connect.
-
You’ll get back to the ETL page and see tables under the Acumatica source on the left panel.
Related Pages
-
Acumatica Technical Details (in Source Systems and IT section)
-
Acumatica OData Extraction Issues / Troubleshooting Solutions to Problems with OData
-
-
OData URL from an Acumatica Instance – how to construct the OData Feed(URL)
-
-