
DataSelf Bridge securely connects DataSelf NOW to data sources in your private cloud or on-premises network through a dedicated, SSL-encrypted reverse proxy connection to your DataSelf NOW instance.
To get started, install Bridge on a Windows computer that can access your data source, configure the local connection, and add the source in DataSelf NOW.
Before you begin
Have the following information ready:
|
Information |
Where you’ll use it |
|---|---|
|
One-time enrollment code, provided by DataSelf |
During Bridge installation |
|
Bridge server address and port, provided by DataSelf |
When adding the data source |
|
Local data source hostname or IP address and port |
When configuring Bridge |
|
Database name and credentials with read access, as applicable |
When configuring the data source in DataSelf NOW |
You’ll also need permission to install software and approve Windows User Account Control prompts.
1. Install DataSelf Bridge
Install Bridge on a Windows computer that can reach your data source.
-
Run the installer and click Next.
-
Leave the Server URL unchanged.
-
Enter the one-time enrollment code provided by DataSelf.
-
Click Next, then Install.
-
Click Yes if Windows displays a User Account Control prompt.
-
Click Finish.
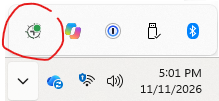
DataSelf Bridge should now be running as a Windows service, with its icon available in the Windows system tray.
2. Configure access to your local data source
This step tells Bridge how to reach the database server or service on your network.
-
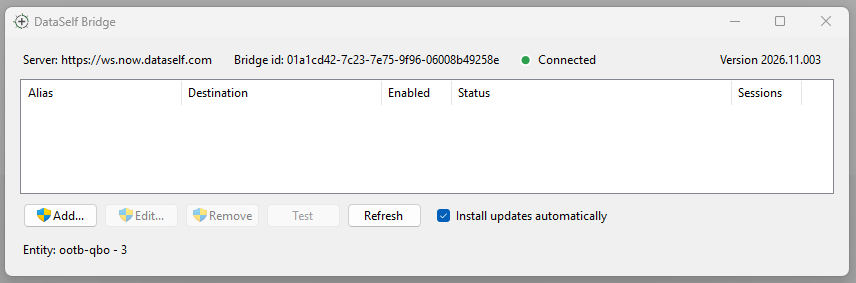
Double-click the DataSelf Bridge icon in the Windows system tray.
-
Click Add.
-
Click Yes if Windows displays a User Account Control prompt.
-
Enter the connection details:
-
-
Alias: A descriptive name, such as
Accounting SQL Server. -
Host or IP: The hostname or IP address of the data source server, reachable from the Bridge computer. Use
localhostif the source runs on the same computer. -
Port: The port on which the data source service listens.
-
Example: For SQL Server running on the Bridge computer and configured to use port
1433, enterlocalhostas the host and1433as the port.
-
-
Click OK.
-
Confirm that the new entry appears with an Active status.
A single server connection can provide access to multiple databases. You’ll select the database and enter its credentials when adding each source in DataSelf NOW.
3. Add the data source in DataSelf NOW
-
Open your DataSelf NOW site:
https://<DataSelf NOW ID>.apps.dataself.com/ -
Click Server at the top of the page.
-
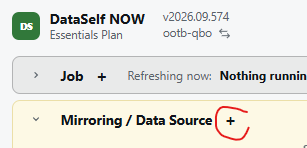
Click + in the Mirroring/Data Source panel header.
-
Select your data source type.
-
Configure the connection:
-
Server: The Bridge server address provided by DataSelf.
-
Port: The Bridge port provided by DataSelf.
-
Other connection fields: The database name, credentials, and any additional settings required by your source type.
-
-
Click Test connection.
-
When the test succeeds, click Add source.
-
Click + next to the new data source to select and map its tables.

If the connection test fails
Check the following:
-
The DataSelf Bridge Windows service is running.
-
The connection entry in Bridge shows Active.
-
The local hostname/IP and port are correct and reachable from the Bridge computer.
-
DataSelf NOW uses the Bridge server address and port provided by DataSelf.
-
The database name and credentials are correct, and the account has read access to the required data.
If the issue persists, contact your DataSelf representative with the connection error message.